How I set up my blog (and how you can too)
Welcome to my first post on my new blog! In this post, I’ll walk you through the process of setting up my blog and website setup. Among the things you will find in my guided tutorial are the tools and technologies I used, the reasoning behind my choices, and step-by-step instructions on how you can set up a similar blog for yourself to suit your needs.
The stack
My blog was created with an open-source static site generator called Hugo. Hugo is known for its speed and flexibility making it a great choice for my blog.
There are other static site generators like Jekyll, and even easier, beginner-friendly tools that you can to host your blog like WordPress or Wix, but using Hugo offers several advantages.
It’s fast
Hugo is known for it’s speed. This is because it’s built in the Go programming language, which offers several features like memory safety and efficiency. While this advantage isn’t particularly visible at first glance, it’s useful for frequent deployments and scalability if your project gets large.
It’s powerful
Hugo blog posts are written in markdown. If you’re not familiar with Markdown, it’s a lightweight markup language with plain-text formatting syntax that is easy to learn and widely used! It’s the same language that powers the Obsidian note taking tool, and the same language that is used to create README.md files on GitHub.
It’s customizable
Hugo offers a lot of flexibility, you have a variety of themes to choose from. For my theme, I chose to go with the hugo-blog-awesome theme.
Cloudflare pages
Recently I’ve transitioned from GitHub pages to Cloudflare pages. Both accomplish the same goal, however I settled on Cloudflare pages for a variety of reasons:
- It’s integrated with the rest of my Cloudflare stack, which I’m already using.
- In theory, performance is slightly better since the site is hosted on the Cloudflare network.
- It’s completely free.
With this in mind, it makes the most sense for me to use Cloudflare pages in my setup. We’ll be using this for our tutorial today, however Cloudflare pages is just one fish in the pond. If Cloudflare Pages doesn’t suit your needs, there are several other platforms you can use. Here are a few alternatives:
Tutorial
Step 1: Hugo Installation
This is platform specific, you can refer to the installation guide for installation instructions specific to your operating system.
Step 2: Create hugo site
hugo new site my-blog
Step 3: Installing Theme
We’ll be using hugo-blog-awesome for this example.
cd my-blog
git init
git submodule add https://github.com/hugo-sid/hugo-blog-awesome.git themes/hugo-blog-awesome
Add this to your hugo.toml
theme = "hugo-blog-awesome"
You’ll see a bunch of other settings here that you can customize to your liking. Find an example hugo.toml here.
Step 4: Upload to GitHub
Let’s upload the files to the GitHub repository.
Go to GitHub and create a new empty repository.
Add the origin link, commit your changes, and push:
git branch -M main # select branch
git add * # add all files in the current directory
git commit -m "Upload Files" # commit your changes
git remote add origin https://github.com/yourusername/my-blog.git # replace with your repository URL
git push -u origin main # push to branch
Step 5: Set up Cloudflare pages deployment
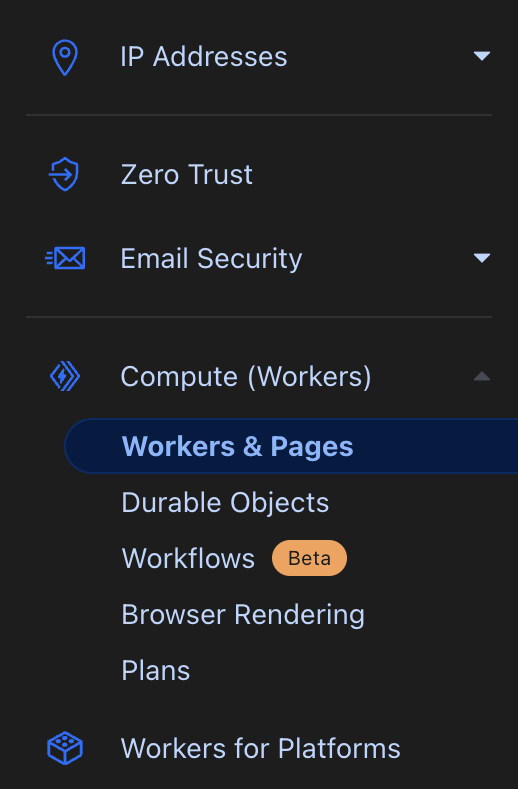
Assuming you already have Cloudflare set up, go to the Cloudflare dashboard. Select “Workers & Pages” from the left side.
In the ‘overview’ page click the “Create” button and select the “Pages” tab. Since we’re connecting this to a GitHub repository, we’ll select “Connect to Git.”
Follow the steps to connect your GitHub account and select the repository that your hugo blog is located in. Select your repository and click “begin setup.”
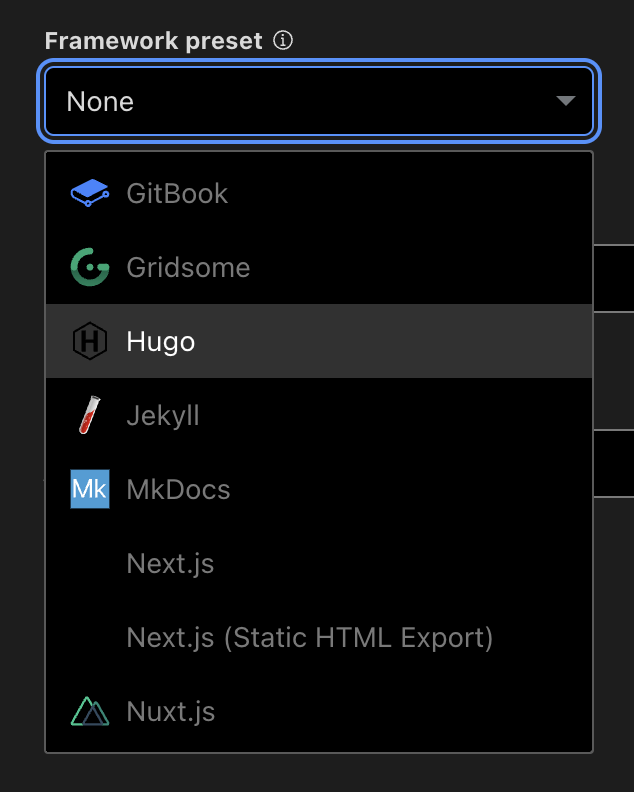
Under “Framework preset” select “Hugo” as your framework.
Click “Save and Deploy!”
Step 6: Set up custom domain link
You can either have your blog at the root of your domain, or you can have it as a subdomain. The process goes as follows:
- From the “Workers & Pages” section on the Cloudflare dashboard, click the name of your repository
- Click “Custom domains”
- Click “Set up a custom domain”
Follow the process to set up your blog with your custom domain. Cloudflare will automate the creation of DNS records for you. Once you’re done, your site should be deployed the domain you choose.
Step 7: Make your first post
To make your first post, type the following into your terminal:
hugo new posts/your-first-post.md
Now, you can open your file in the “posts” folder with your text editor of choice, and use markdown to format and create your first blog post. When you’re done, save the file, and remove the “draft = true” line from the top of your .md file.
You can run a local server to preview your site with
hugo server
Once everything is to your liking, commit and push your changes:
git add content # add folder with post
git commit -m "Create my first blog post"
git push
Congratulations! You’ve just created your first blog! 🥳🎉
Conclusion
To conclude this post, Hugo is a very powerful tool for developers looking to start a blog. It’s Markdown support for blog posts, along with its extensive customization and theming options, makes it an excellent choice. If you are someone who is already used to typing in Markdown, or you’re a developer looking for an easy way to create a blog, I highly recommend that you give this tool a try.
Thanks for visiting my blog, and reading this post!