Isolating a Virtualized Network for Malware Analysis
Proxmox VE is fairly secure out of the box, but when analyzing malware, we should always assume a zero-trust architecture.
Throughout my semester at Penn State, I conducted malware analysis for my malware analytics class. Testing malicious software on my own hardware meant that I would need a fully isolated environment where malicious traffic is seperated from the rest of my home network.
First Attempt: Using iptables for Isolation
My initial idea was to block host–guest communication with iptables rules on the Proxmox host:
# nat
post-up echo 1 > /proc/sys/net/ipv4/ip_forward
post-up   iptables -t nat -A POSTROUTING -s '192.168.69.0/24' -o vmbr0 -j MASQUERADE
post-down iptables -t nat -D POSTROUTING -s '192.168.69.0/24' -o vmbr0 -j MASQUERADE
# block rfc1918 private networks
post-up   iptables -A FORWARD -s 192.168.69.0/24 -d 10.0.0.0/8 -j DROP
post-up   iptables -A FORWARD -s 192.168.69.0/24 -d 172.16.0.0/12 -j DROP
post-up   iptables -A FORWARD -s 192.168.69.0/24 -d 192.168.0.0/16 -j DROP
post-down iptables -D FORWARD -s 192.168.69.0/24 -d 10.0.0.0/8 -j DROP
post-down iptables -D FORWARD -s 192.168.69.0/24 -d 172.16.0.0/12 -j DROP
post-down iptables -D FORWARD -s 192.168.69.0/24 -d 192.168.0.0/16 -j DROP
# isolate proxmox
post-up   iptables -A INPUT -s 192.168.69.0/24 -d 192.168.69.1 -j DROP
post-down iptables -D INPUT -s 192.168.69.0/24 -d 192.168.69.1 -j DROP
# prevent routing just in case
post-up   iptables -A FORWARD -s 192.168.69.0/24 -d 192.168.69.1 -j DROP
post-down iptables -D FORWARD -s 192.168.69.0/24 -d 192.168.69.1 -j DROP
This was a working solution that had some drawbacks. Relying solely on iptables for isolation can be cumbersome. Any misconfiguration or overlooked rule could inadvertently allow traffic to escape to our private network or reach the host.
Additionally, this setup is missing a DHCP server. There are two possible solutions to this. Our first option would be to set a static IP address on each of our clients, which is not ideal. Our second option would be to set up a DHCP server on our Proxmox host. This can be problematic as it allows for a higher attack surface on our Proxmox host. If, for example, there is an exploit in DHCP that allows for remote code execution, this would hypothetically give a compromised client shell access to the host, which is not acceptable.
A more streamlined approach: Virtualizing OPNsense as a Firewall
A cleaner solution is to use a firewall. Utilizing a firewall gives us more flexible network segmentation, build-in DHCP, and advanced security options, all without putting our virtualization host at risk!
In this project, we’re going to be running OPNsense as our firewall of choice inside a virtual machine. However, these steps can be reproduced on pfSense or any other virtual firewall software.
Installation
-
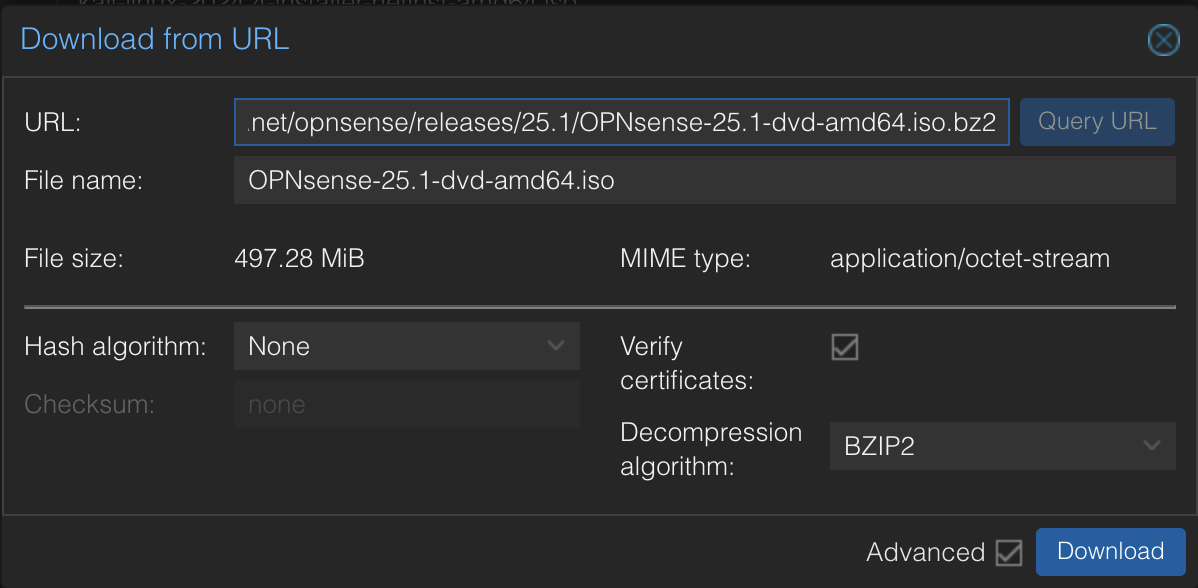
Download the OPNsense ISO at opnsense.org/download/
-
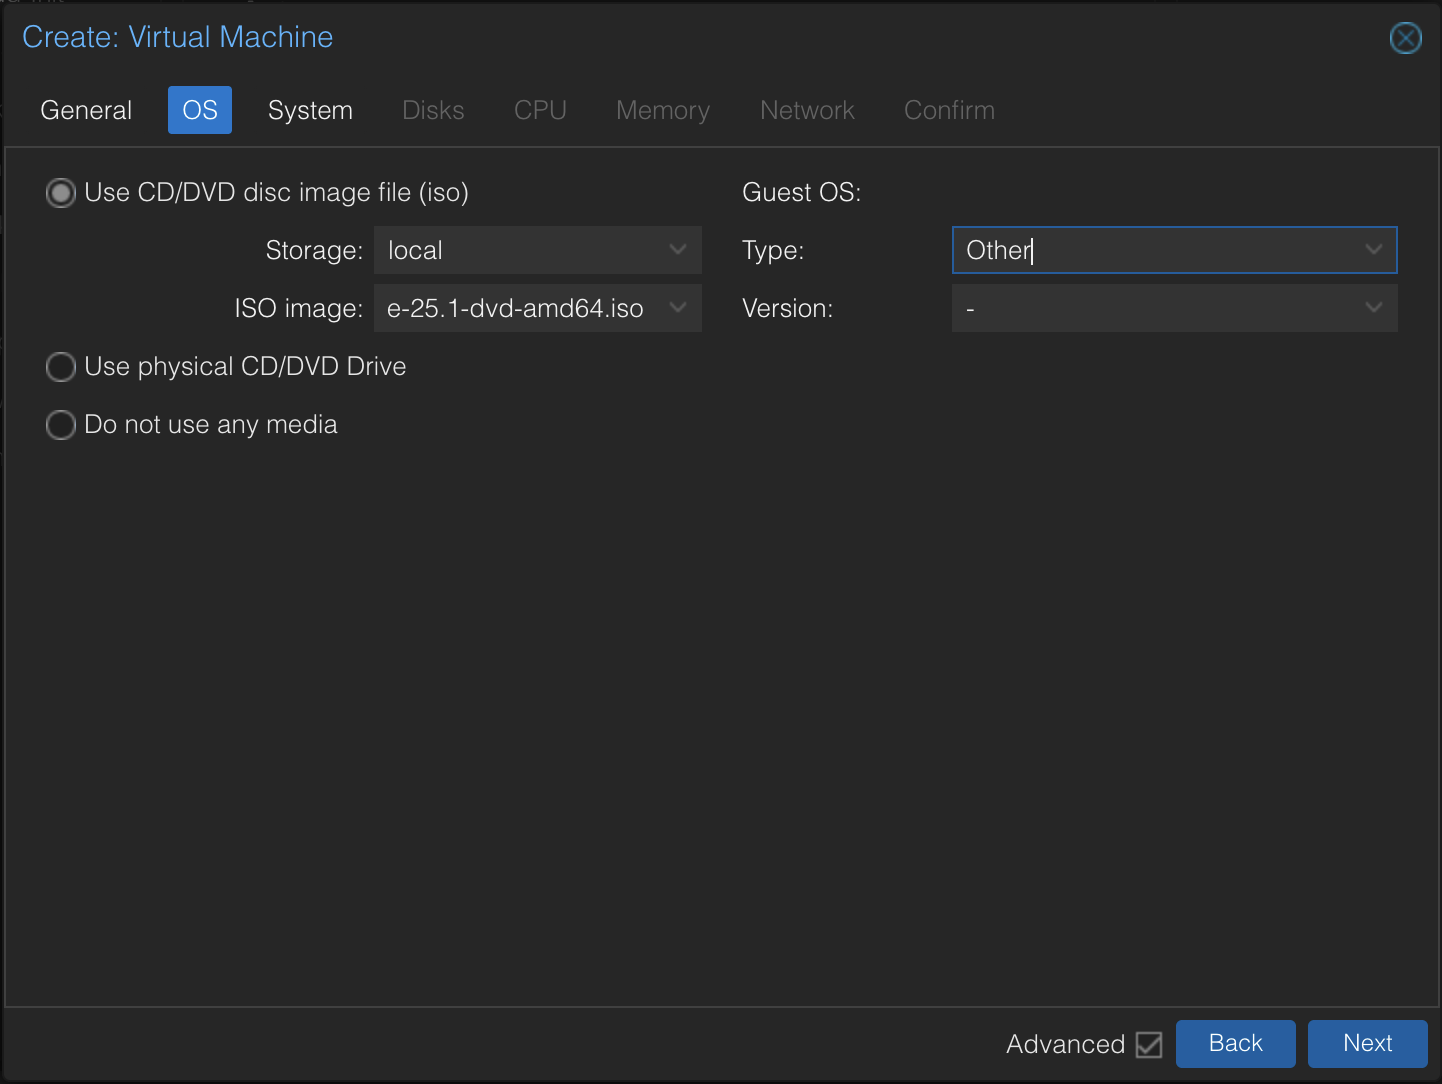
Create a Proxmox VM. Select the ISO and set the OS type to Other.
-
Configure the first network device for internet access (use
virtiofor performance).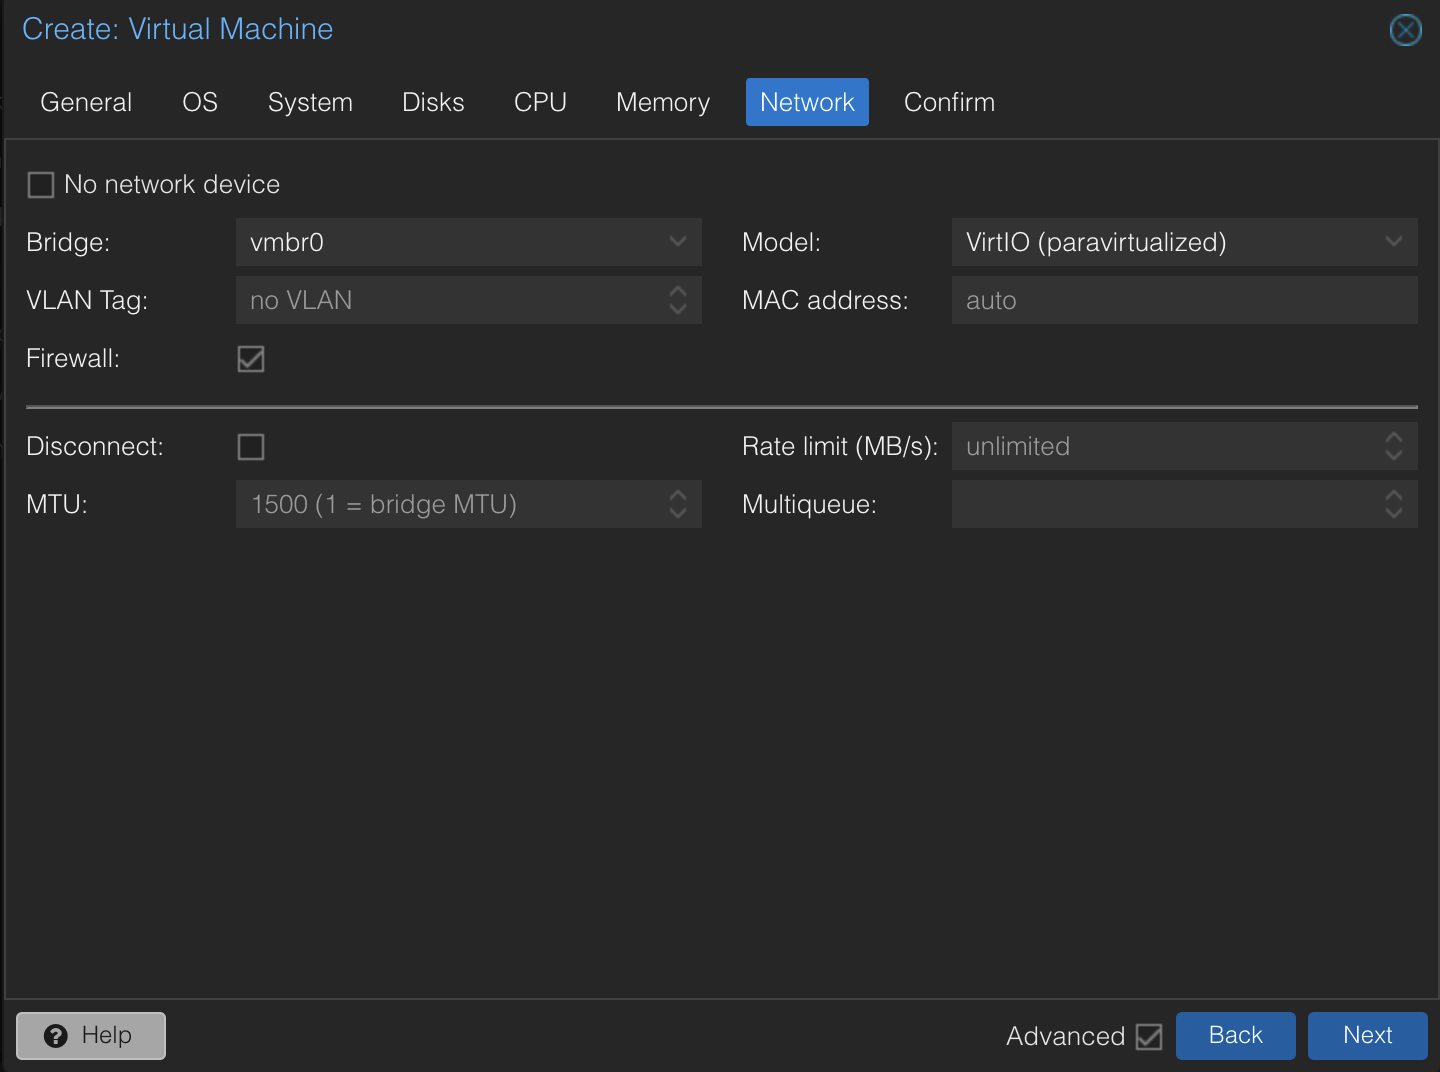
-
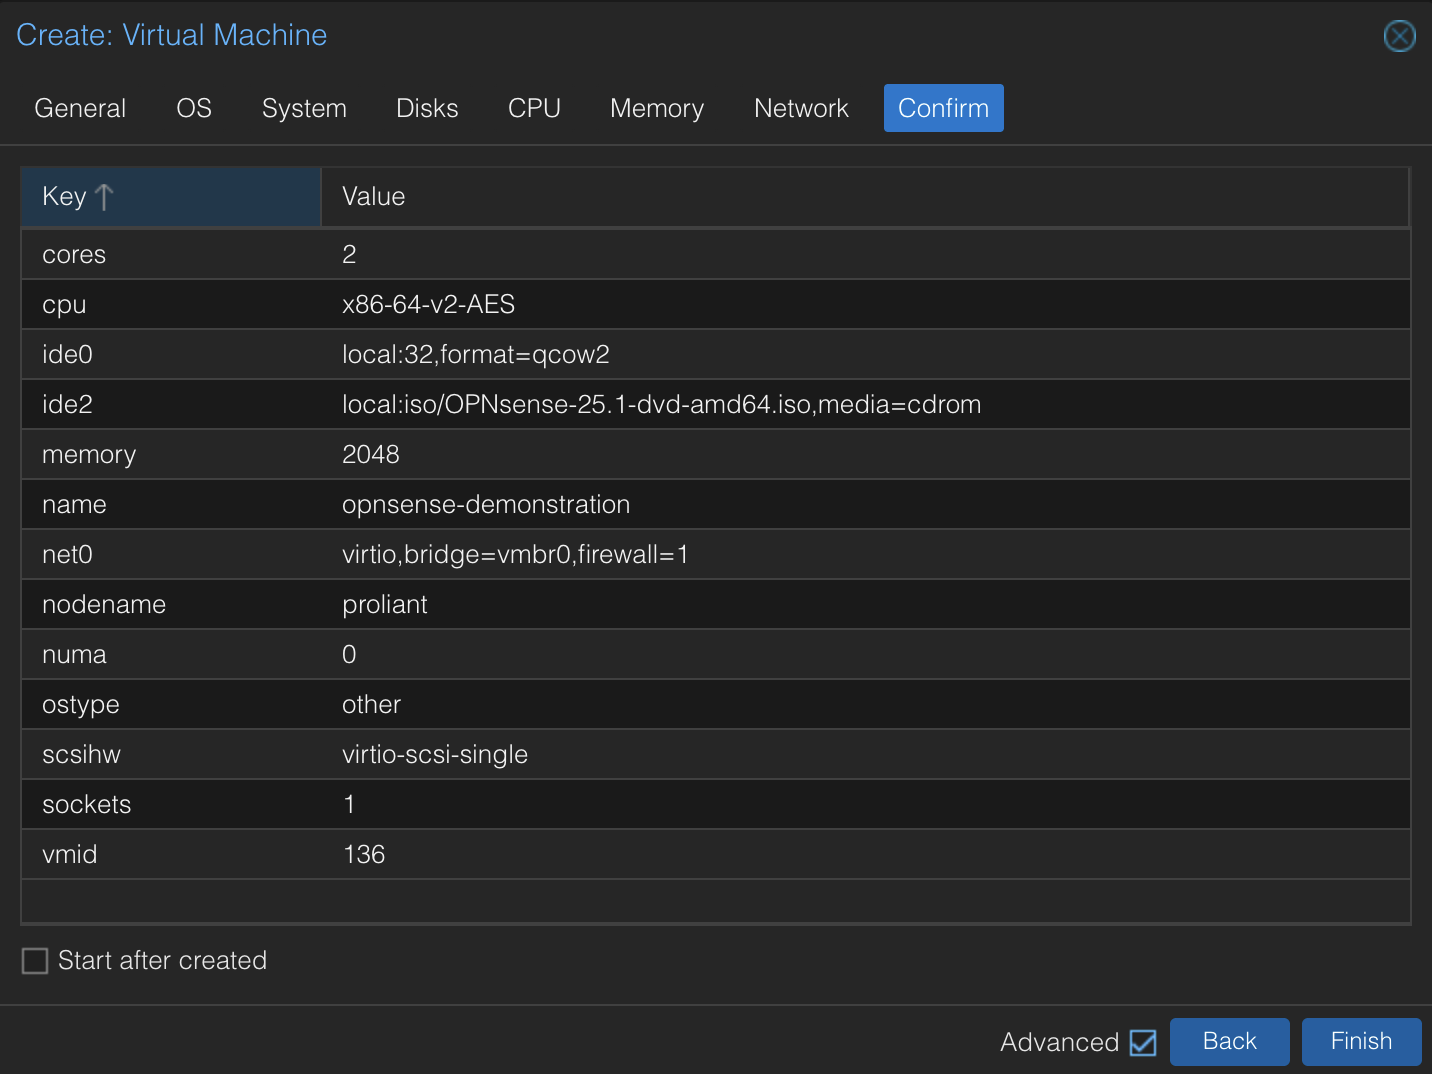
Create the VM. Uncheck “Start after creation” as we don’t want to start it just yet.
Now, we’ll need to create the second port for the isolated network. Head over to your Proxmox server settings (click on the name of your server, in my case “proliant”) and go to > Network. Create a new bridge, and leave the fields blank.
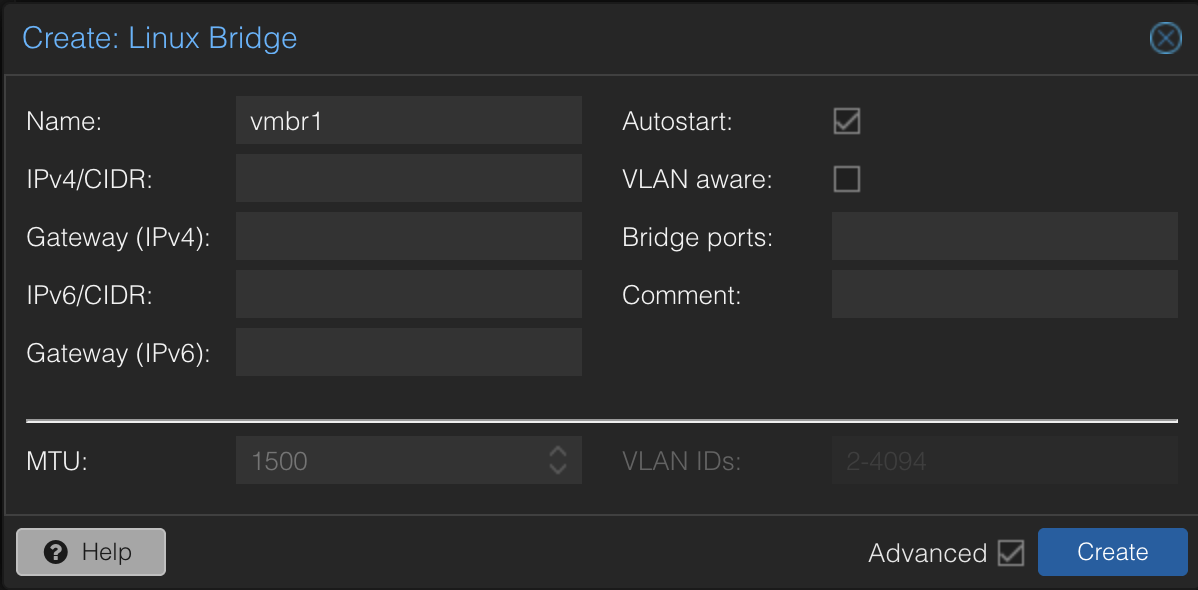
Click Apply Configuration.
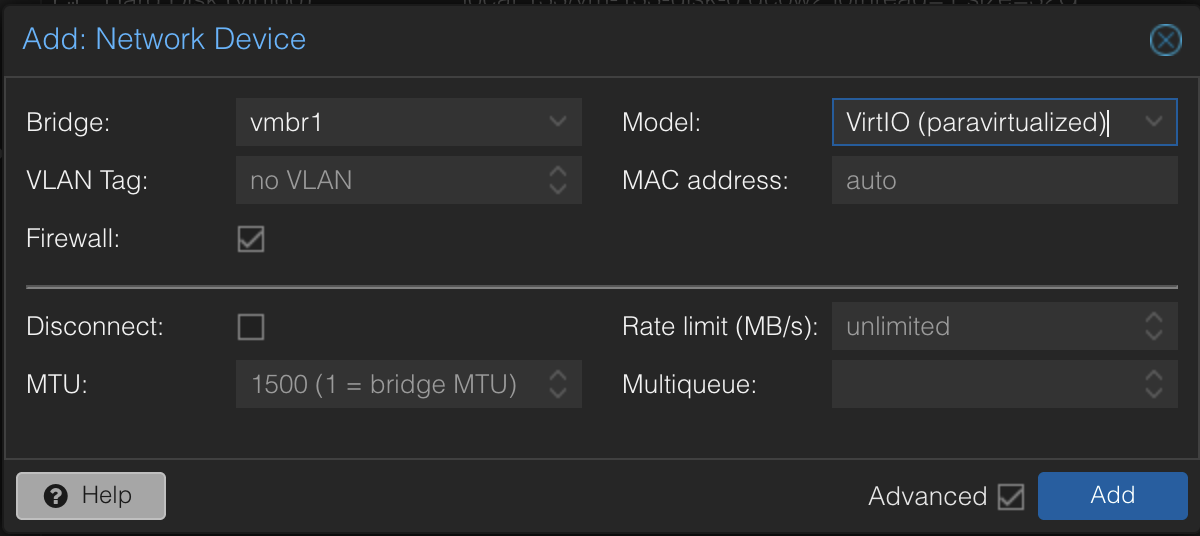
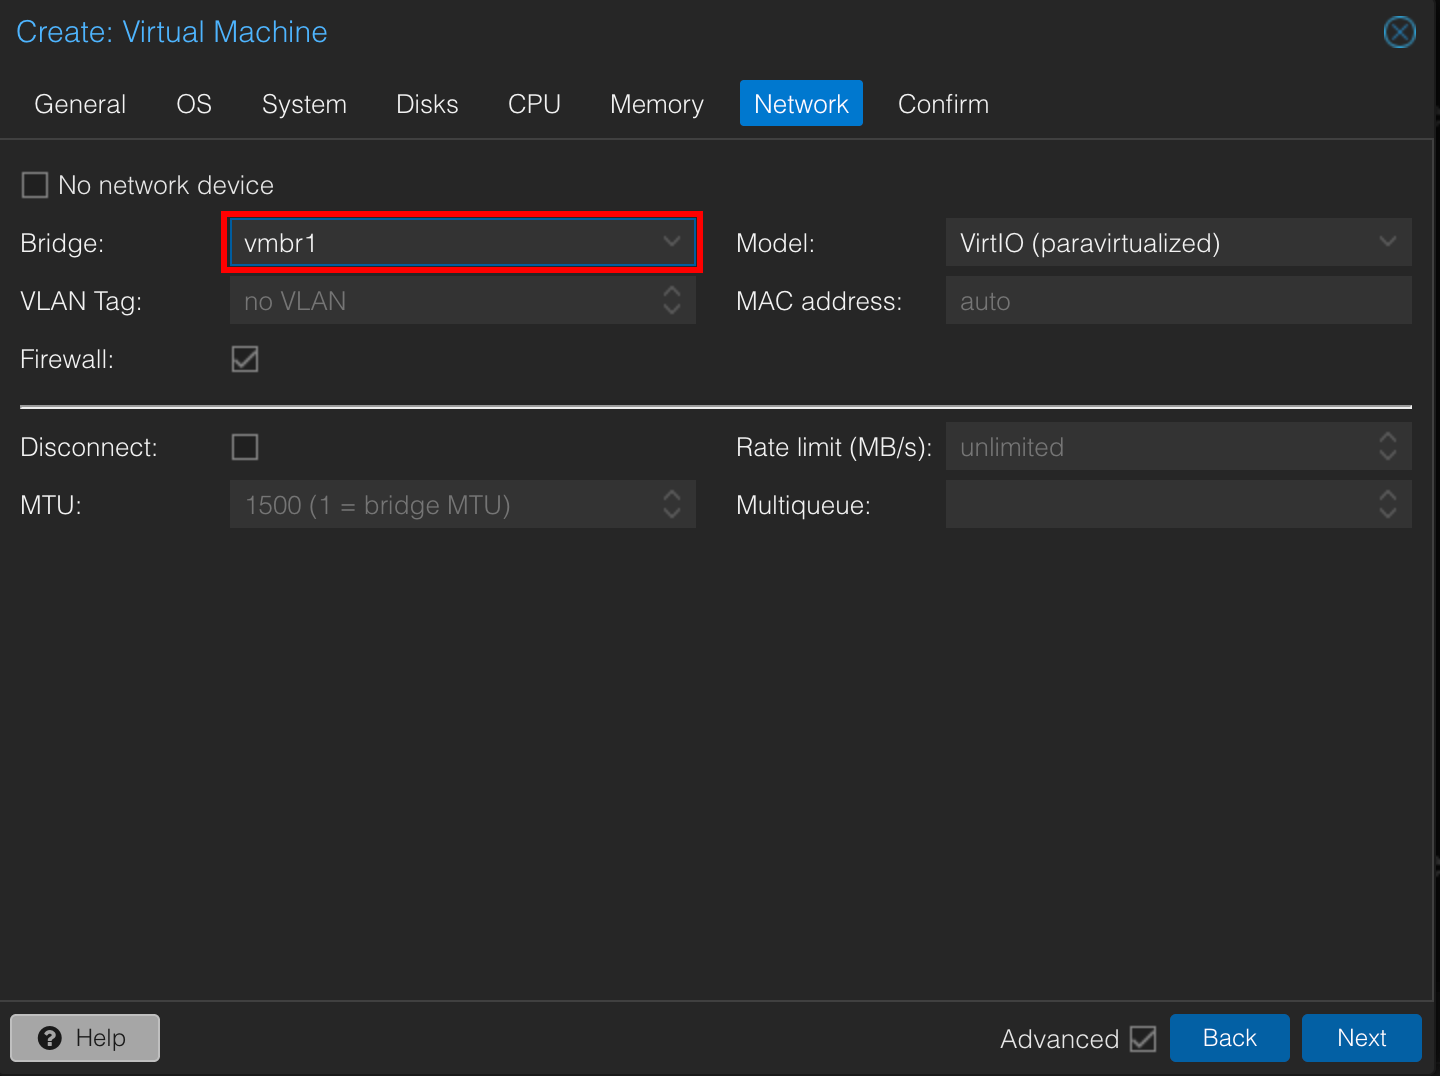
Go back to your VM and add a Network Device. Set the bridge to the network adapter you’ve just created.
Now, start the VM. Log in with the username installer / password opnsense. Follow the guided steps to install the system.
Initial Configuration
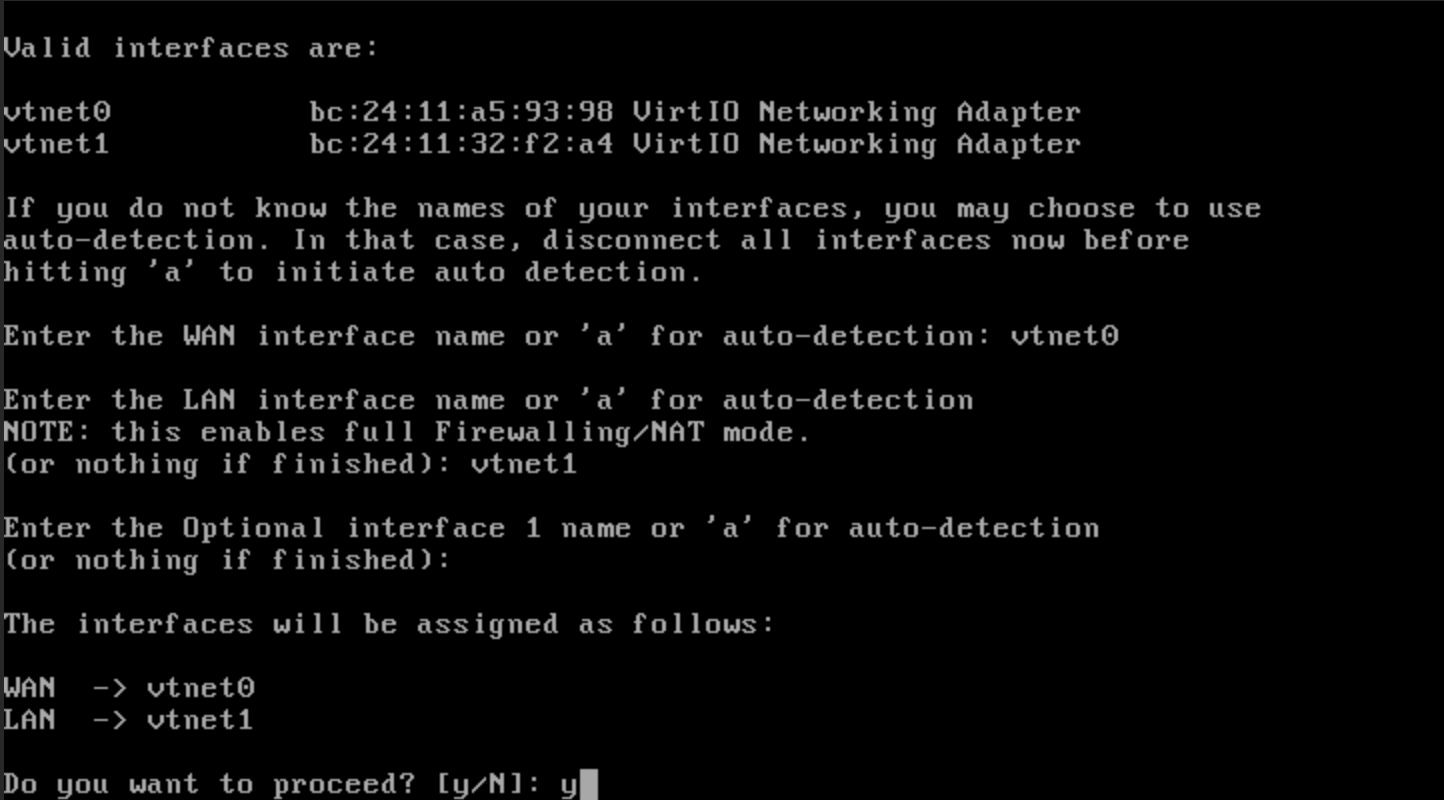
When you are finished installing, login to the VM. Press 1 to assign an interface IP address. Assign your WAN to the first interface (in our case vtnet0) so that it will get an IP on your network. The port of your VMs should be to the LAN (vtnet1). Verify that the setup is correct and then click “y” to finalize the process.
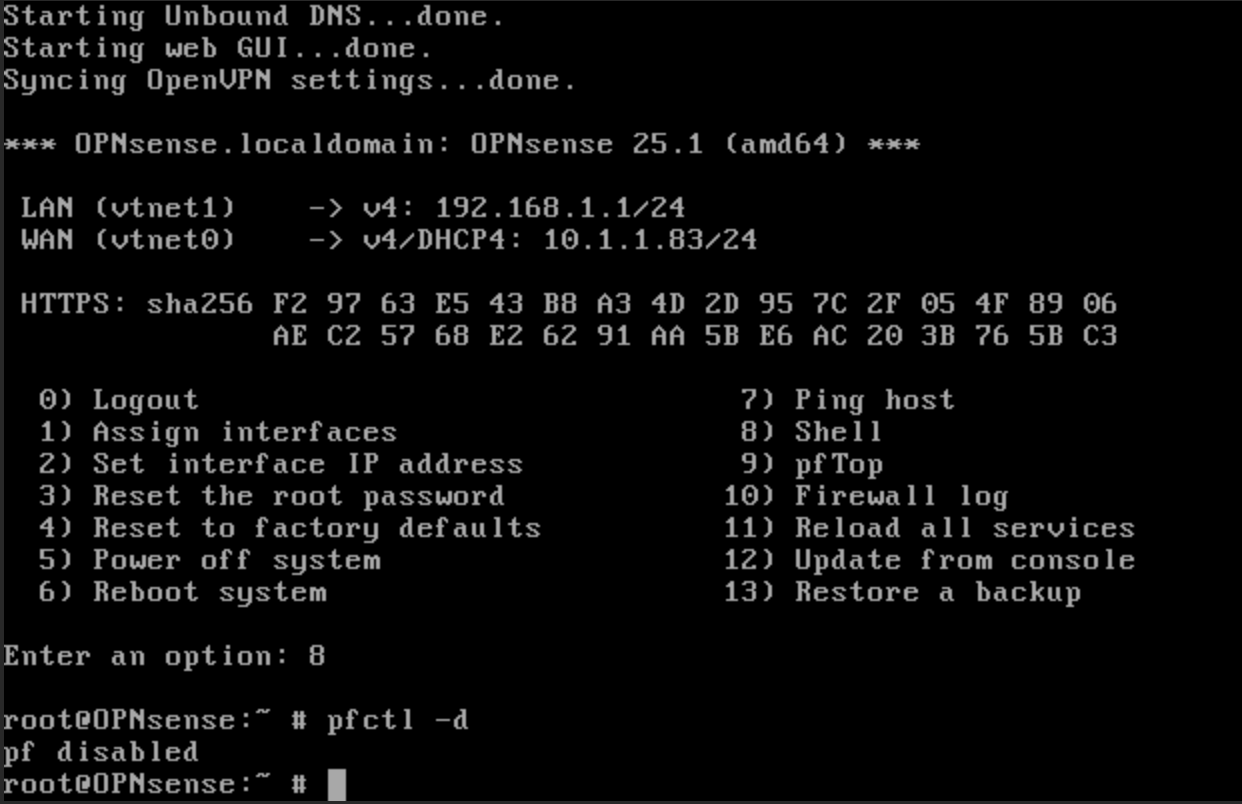
To access the Web GUI from here, we will need to temporarily disable OPNsense’s packet filtering capability. Please ensure that OPNsense is on your local network and cannot be accessed from the public internet for this process for security reasons. On the OPNsense console, press 8 and type pfctl -d to disable packet filtering.
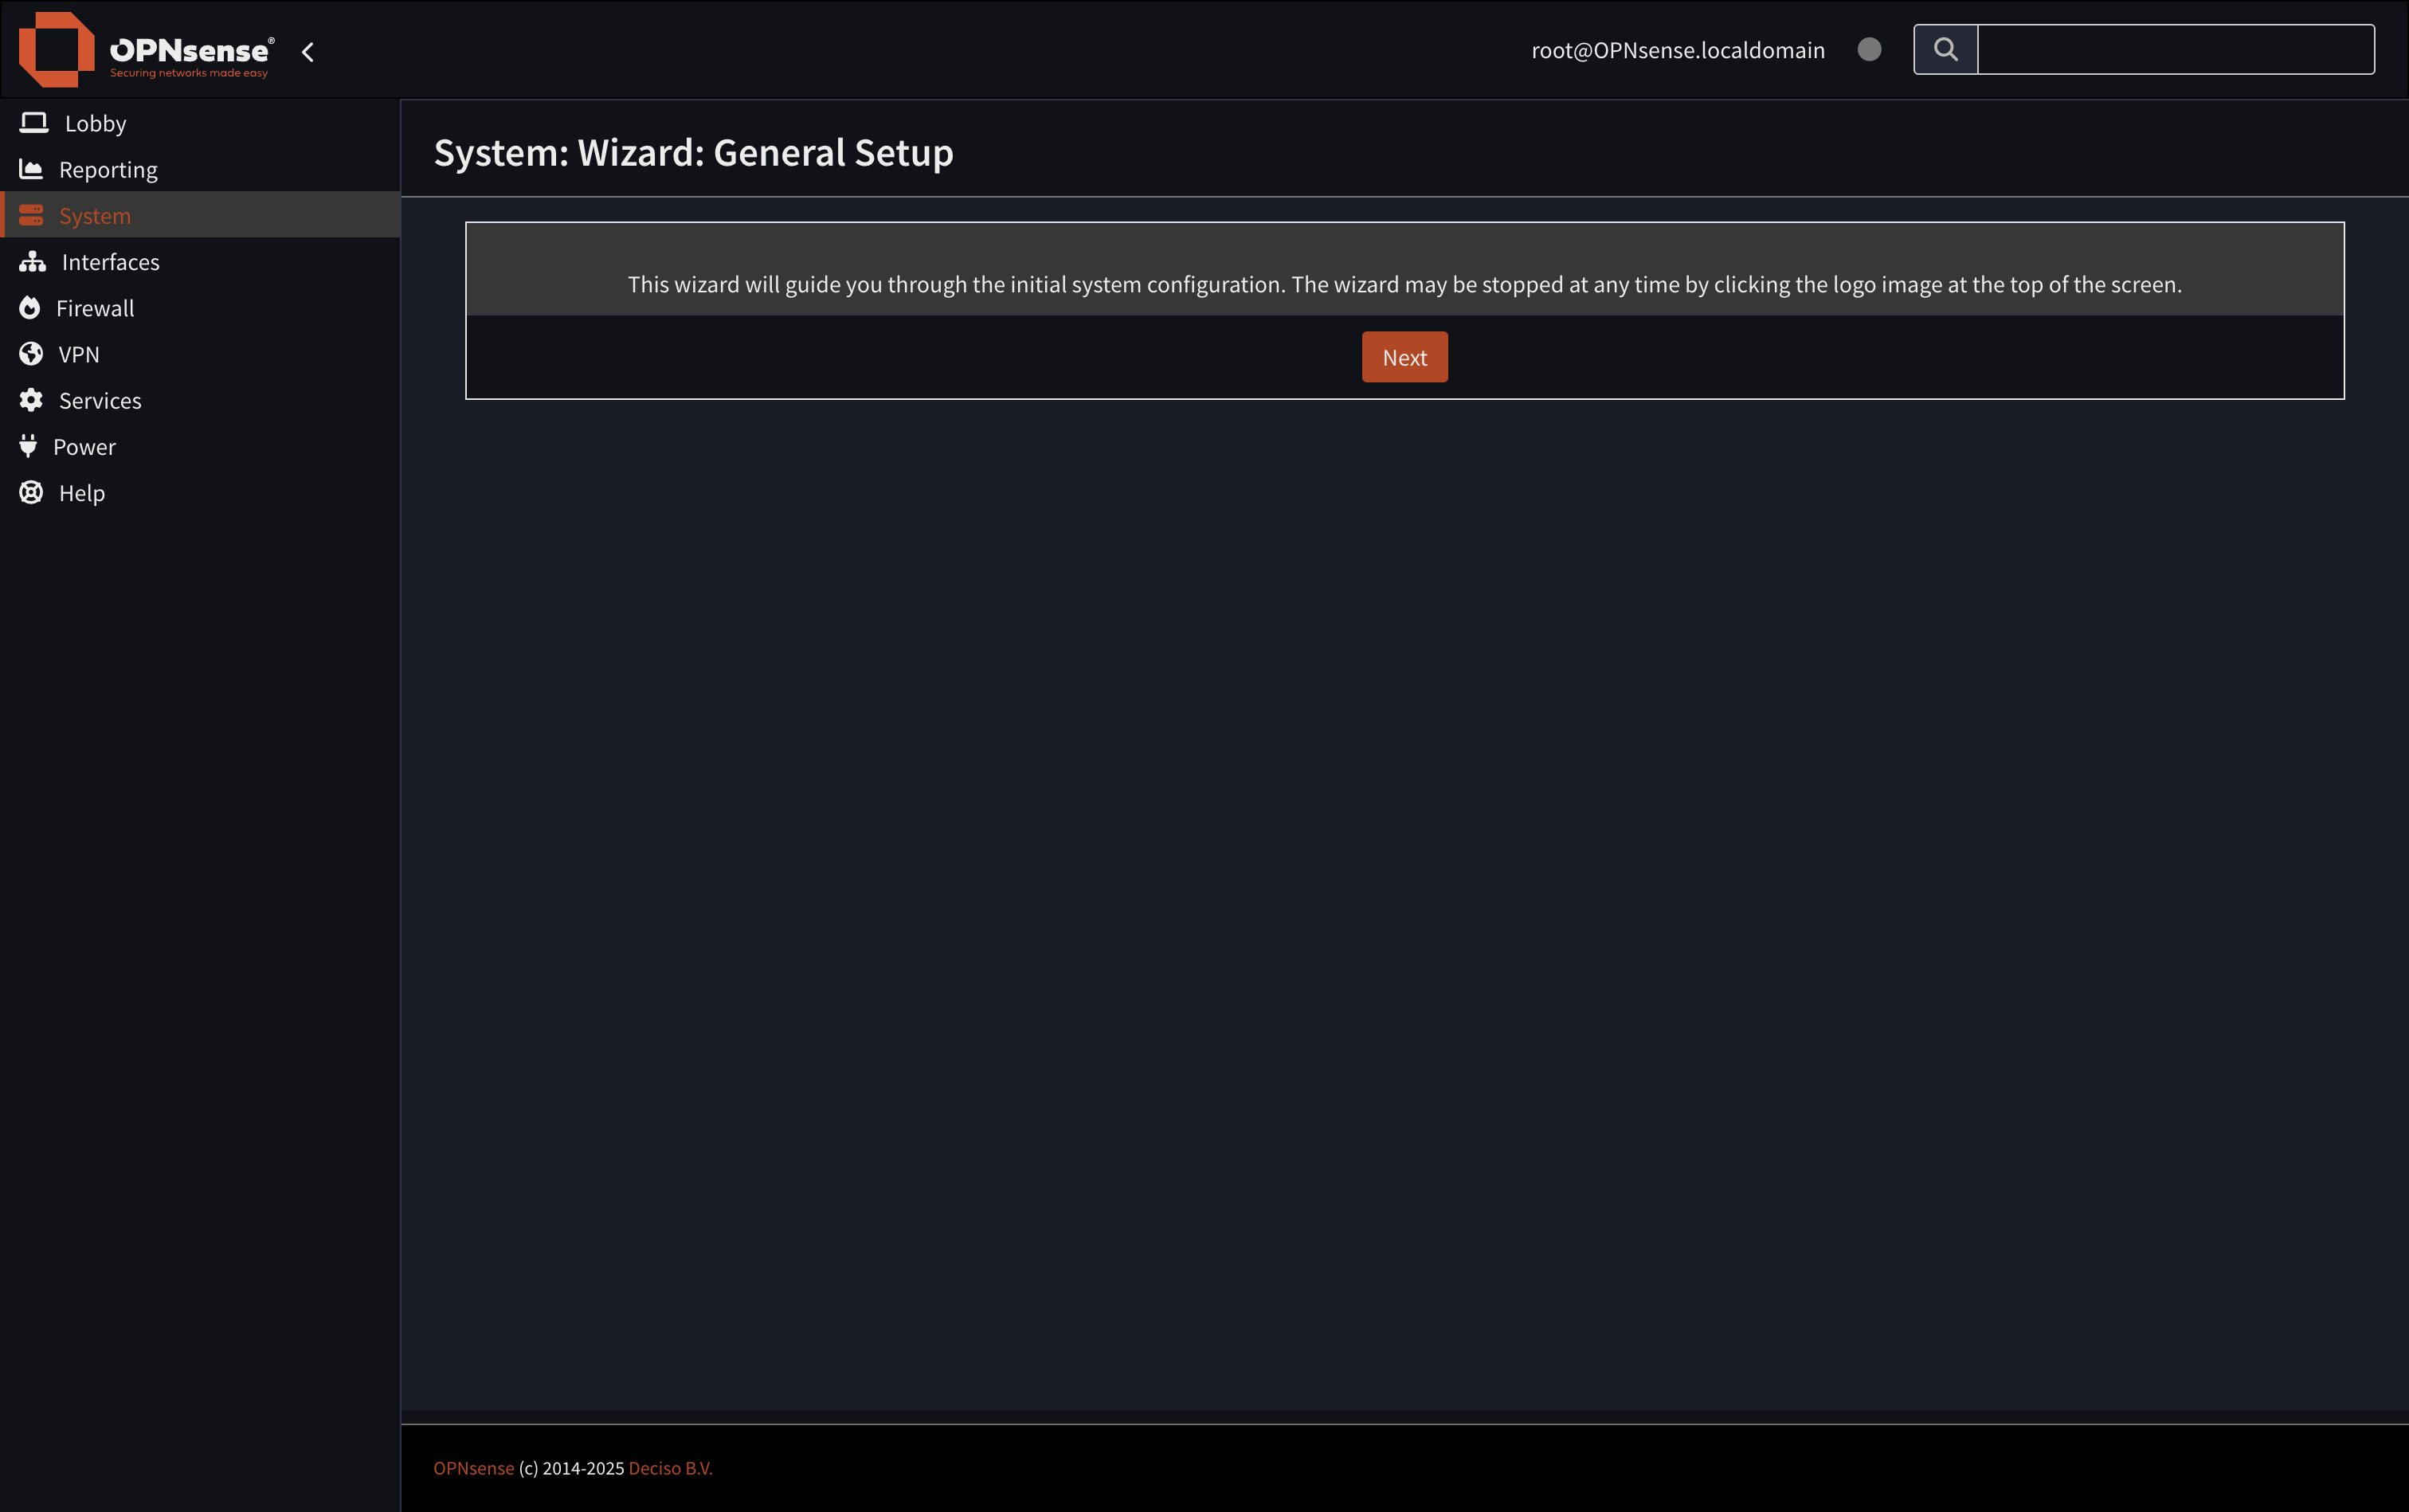
Now, to configure your opnsense box, you can go to the IP address on your local network in a web browser. You should be brought to the setup wizard.
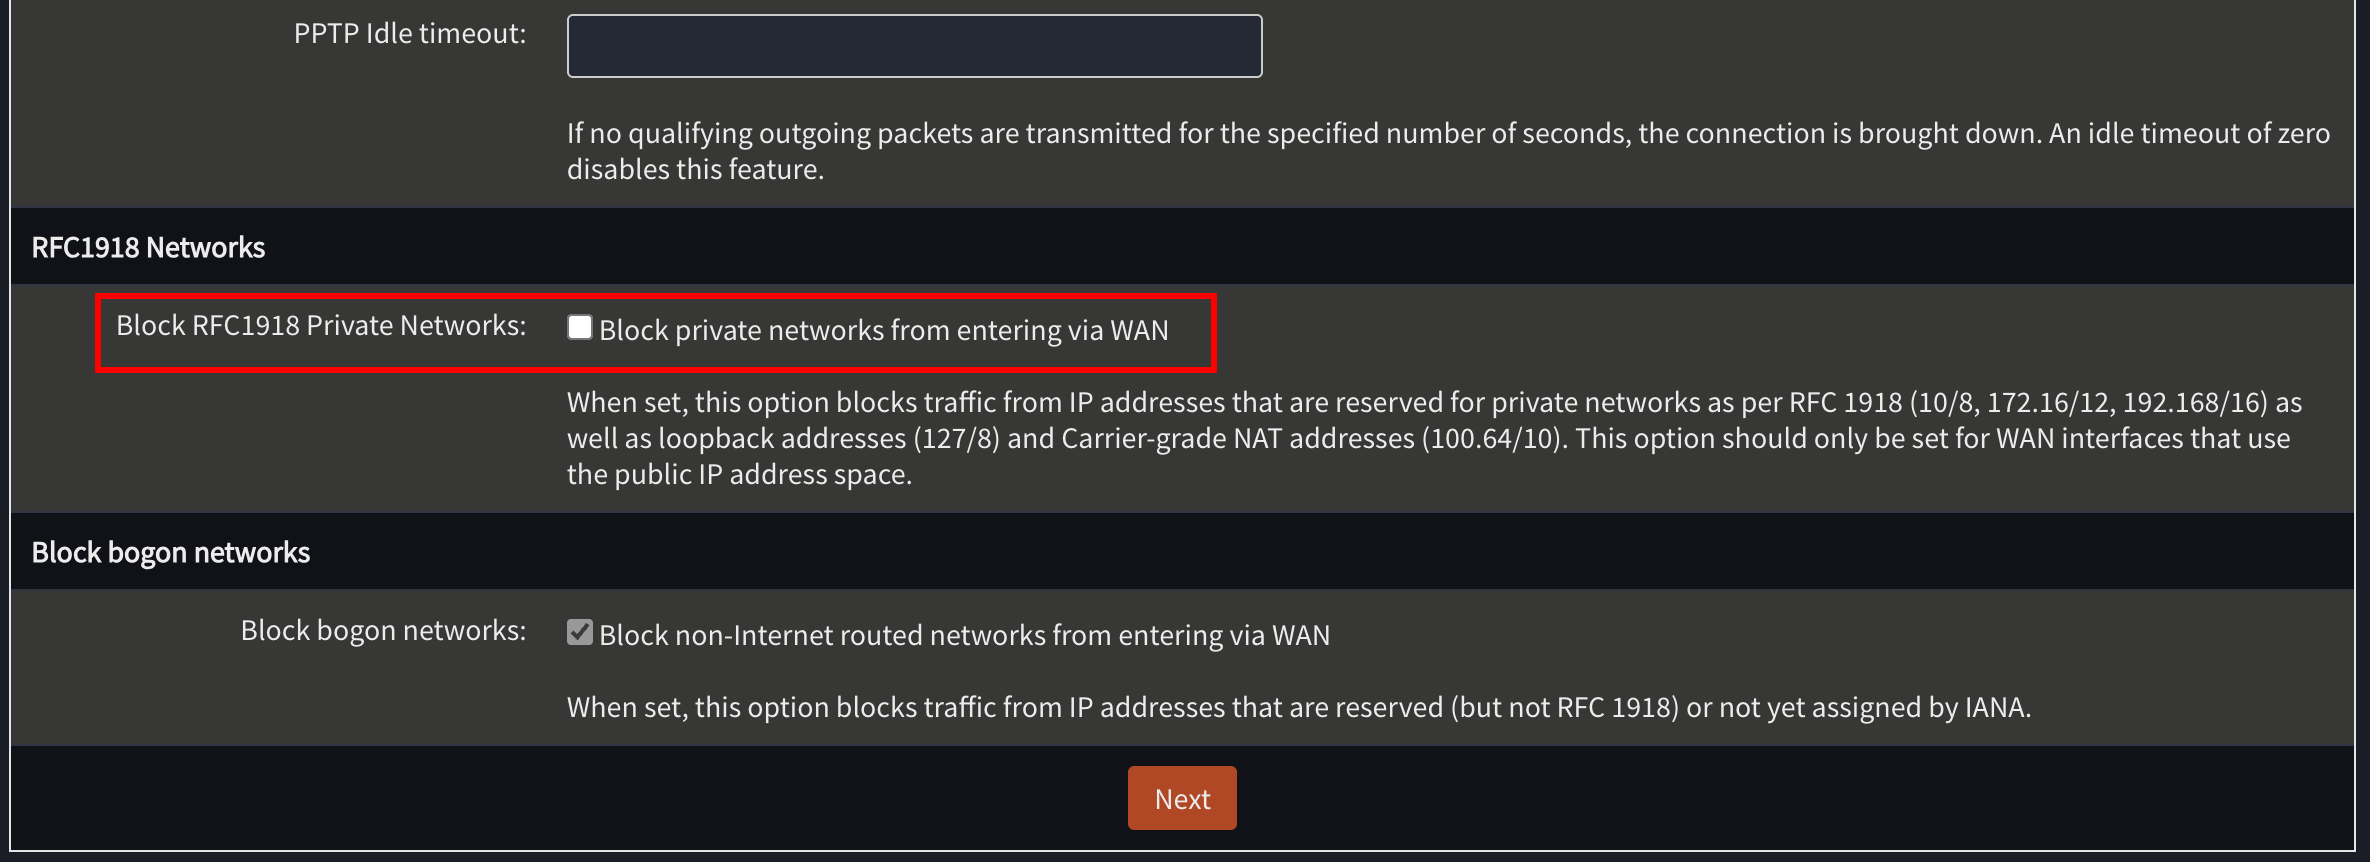
Follow the steps in the wizard to set up your OPNsense install. Make sure Block private networks from entering via WAN is set to false.
Once you have finished the configuration, you will need to adjust your settings to make sure you are still able to access the web UI from the WAN interface of the machine.
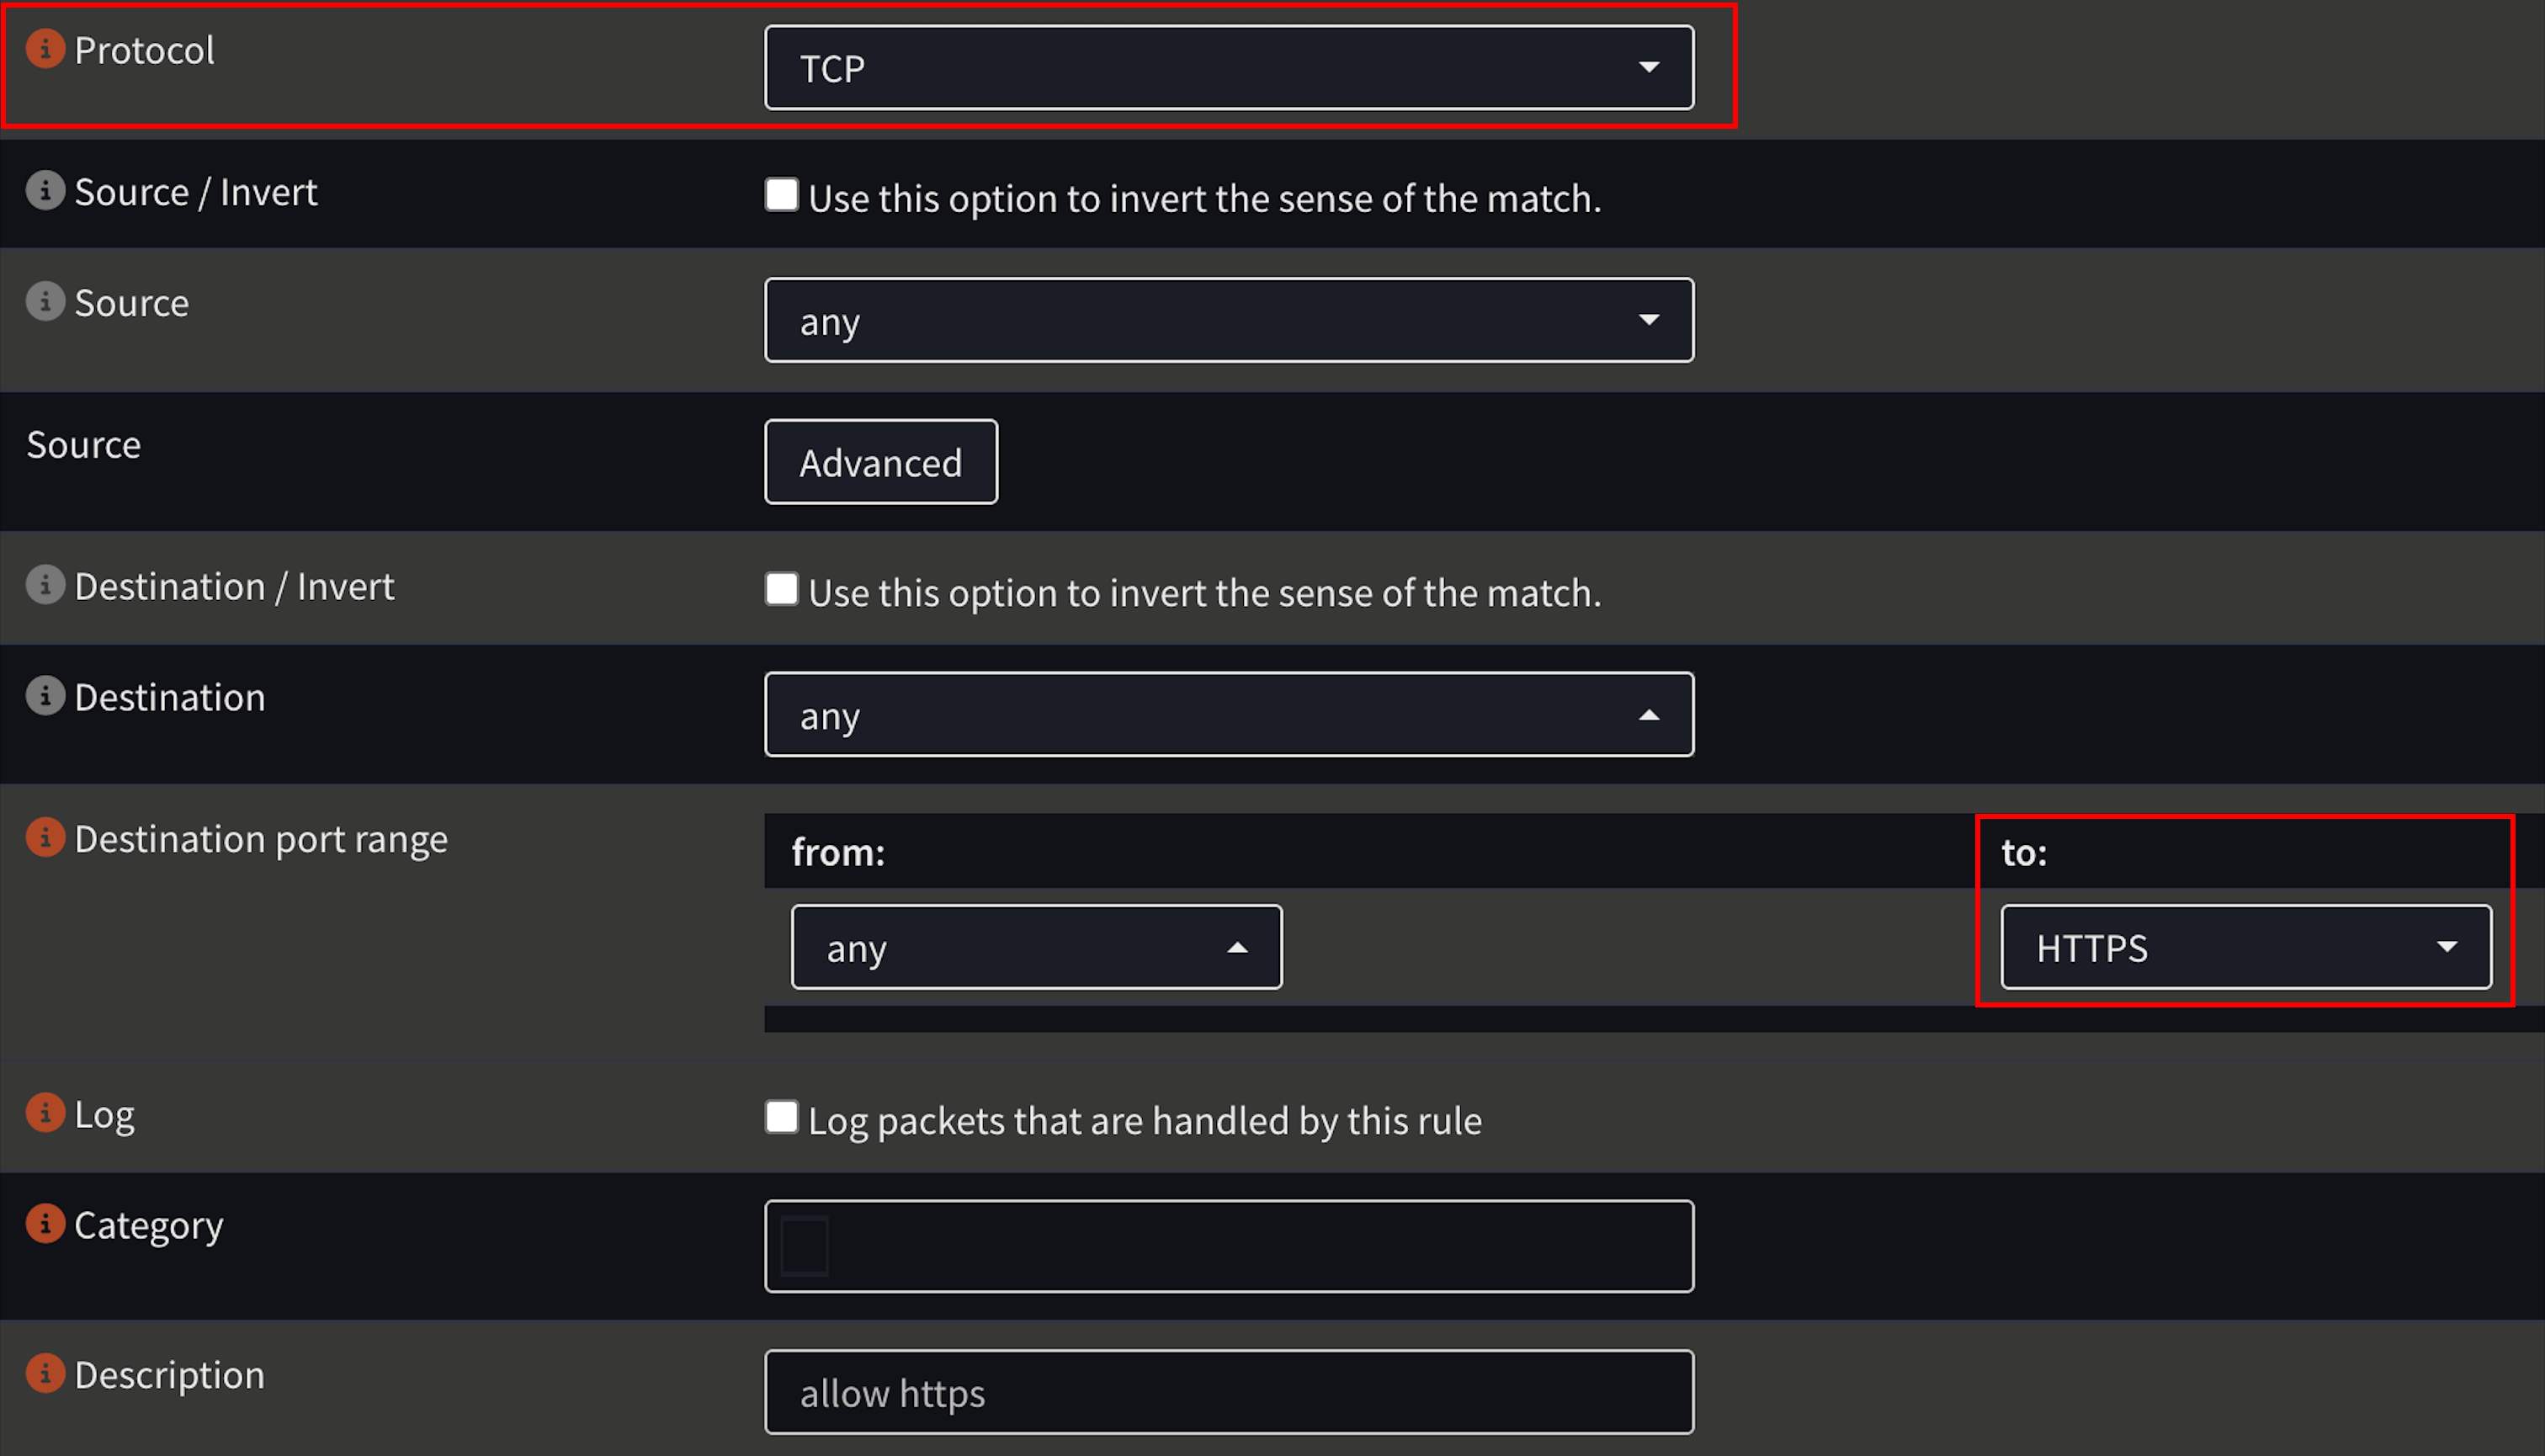
First, lets create firewall rules to allow ssh, https, and http (optional) on the WAN interface over TCP. Head over to Firewall > Rules > WAN, and add these rules. Set the protocol to TCP, and the destination port range to the service you want to add. Here is what your HTTPS rule should look like as an example:
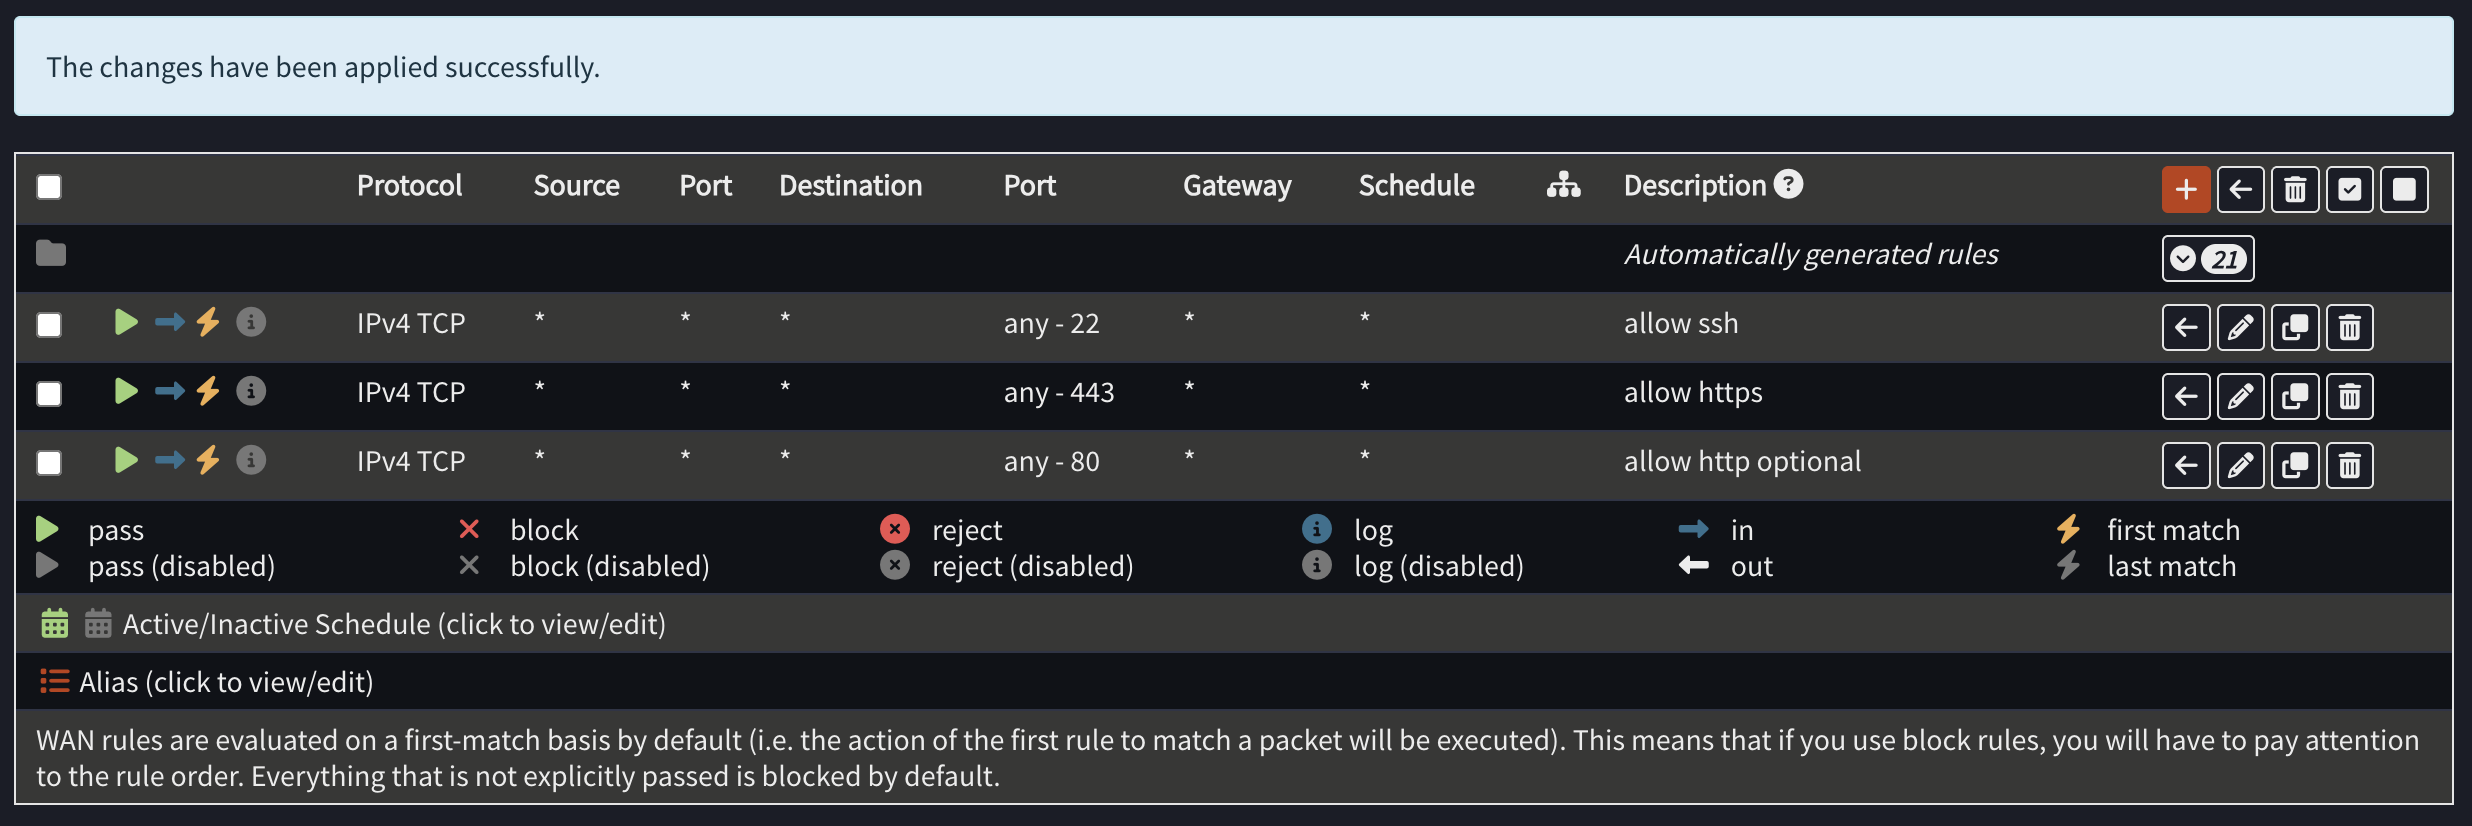
Once you have finished adding these rules, your end result should look like this:
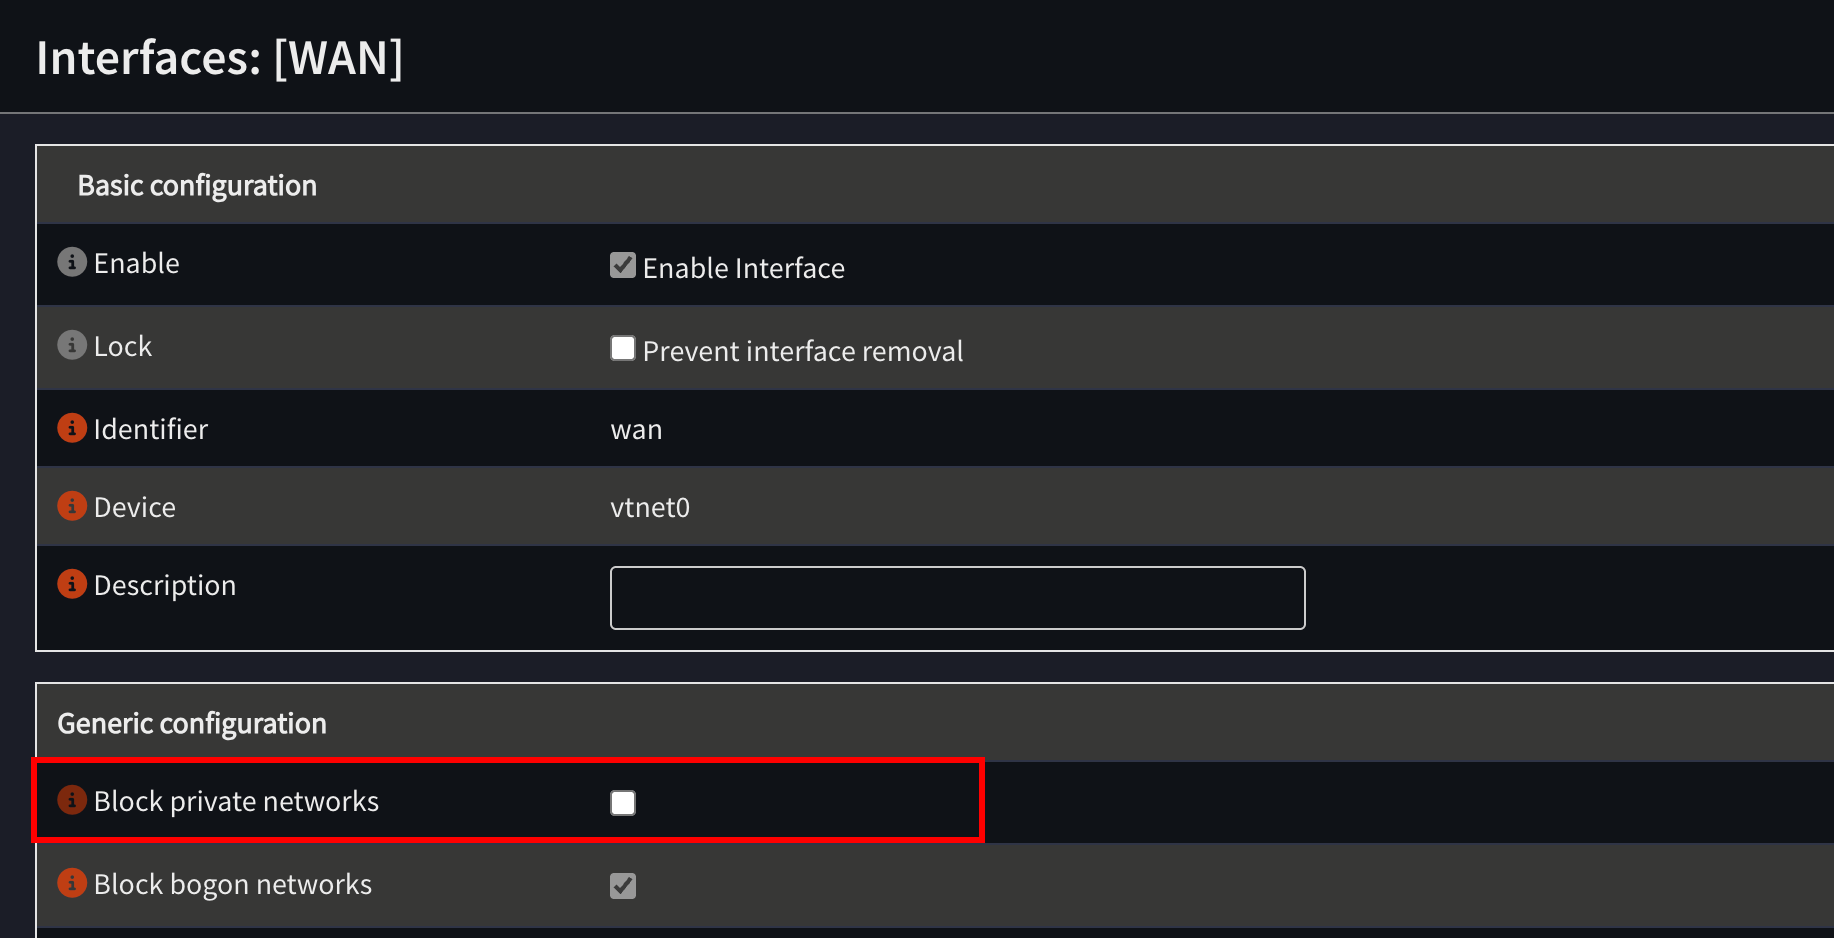
Now, under Interfaces > WAN > Generic Configuration you will need to disable Block private networks and Block bogon networks.
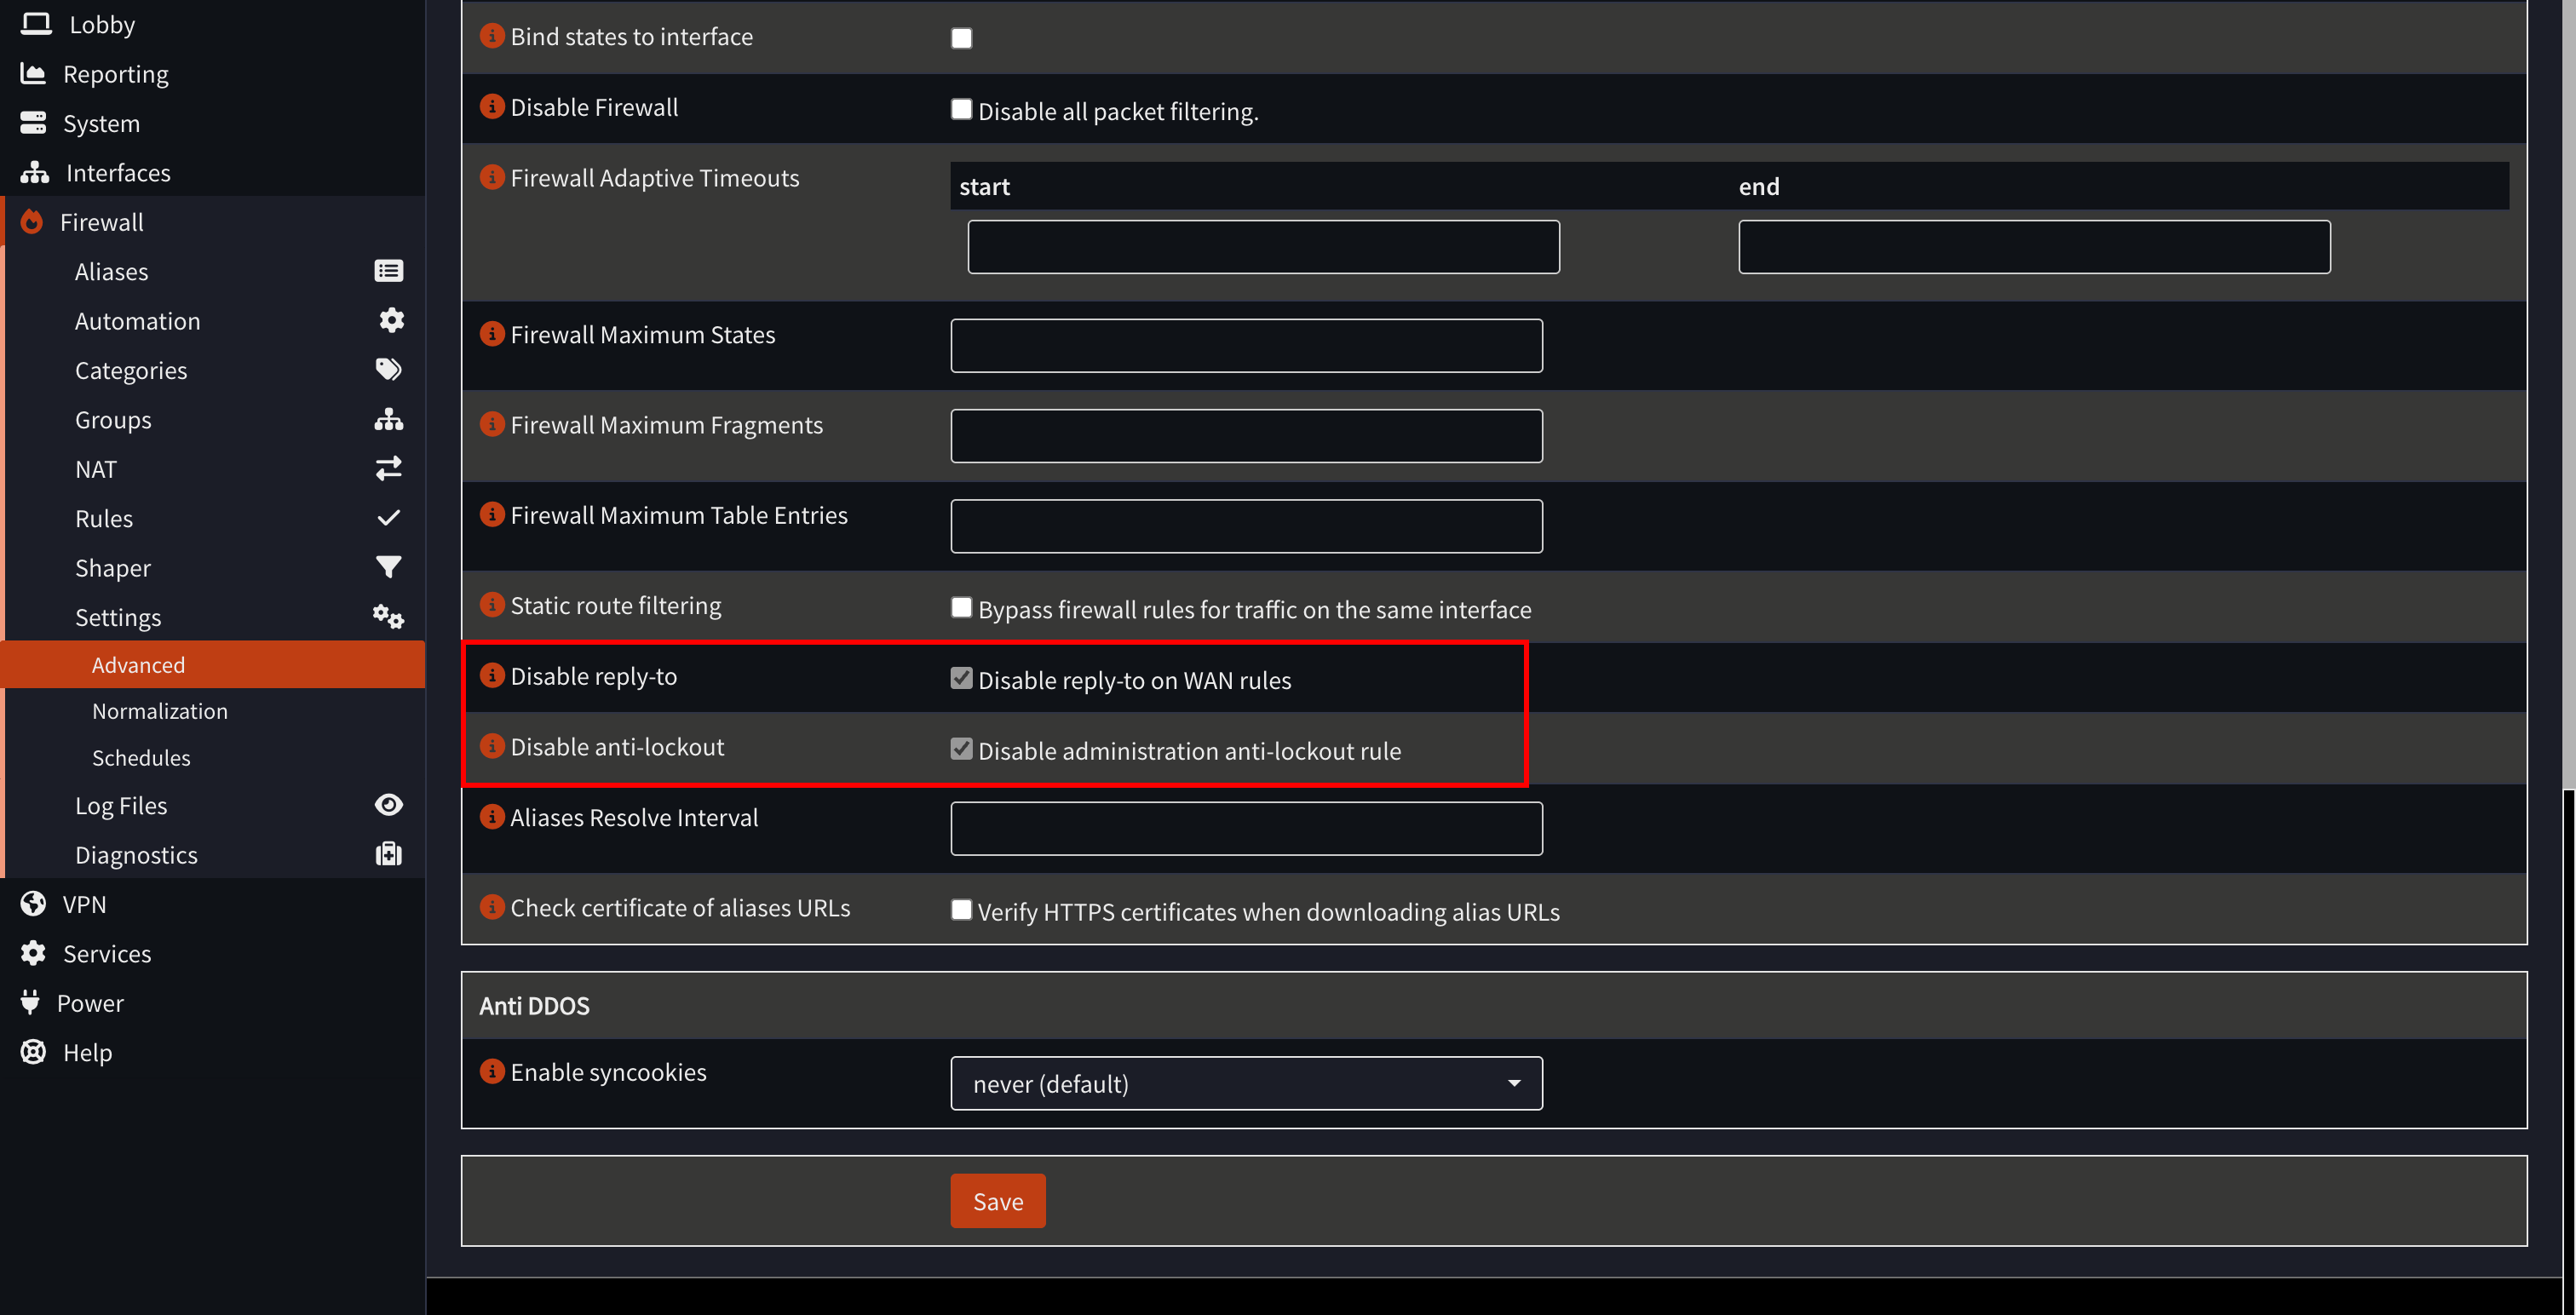
Now, go to Firewall > Settings > Advanced, and enable Disable reply-to on WAN rules. You can also enable Disable administration anti-lockout rule for enhanced security, this way VMs on your LAN won’t be able to access the OPNsense web UI.
Now, you may re-enable the firewall with the pfctl -e command or restart your OPNsense machine.
Securing our Network
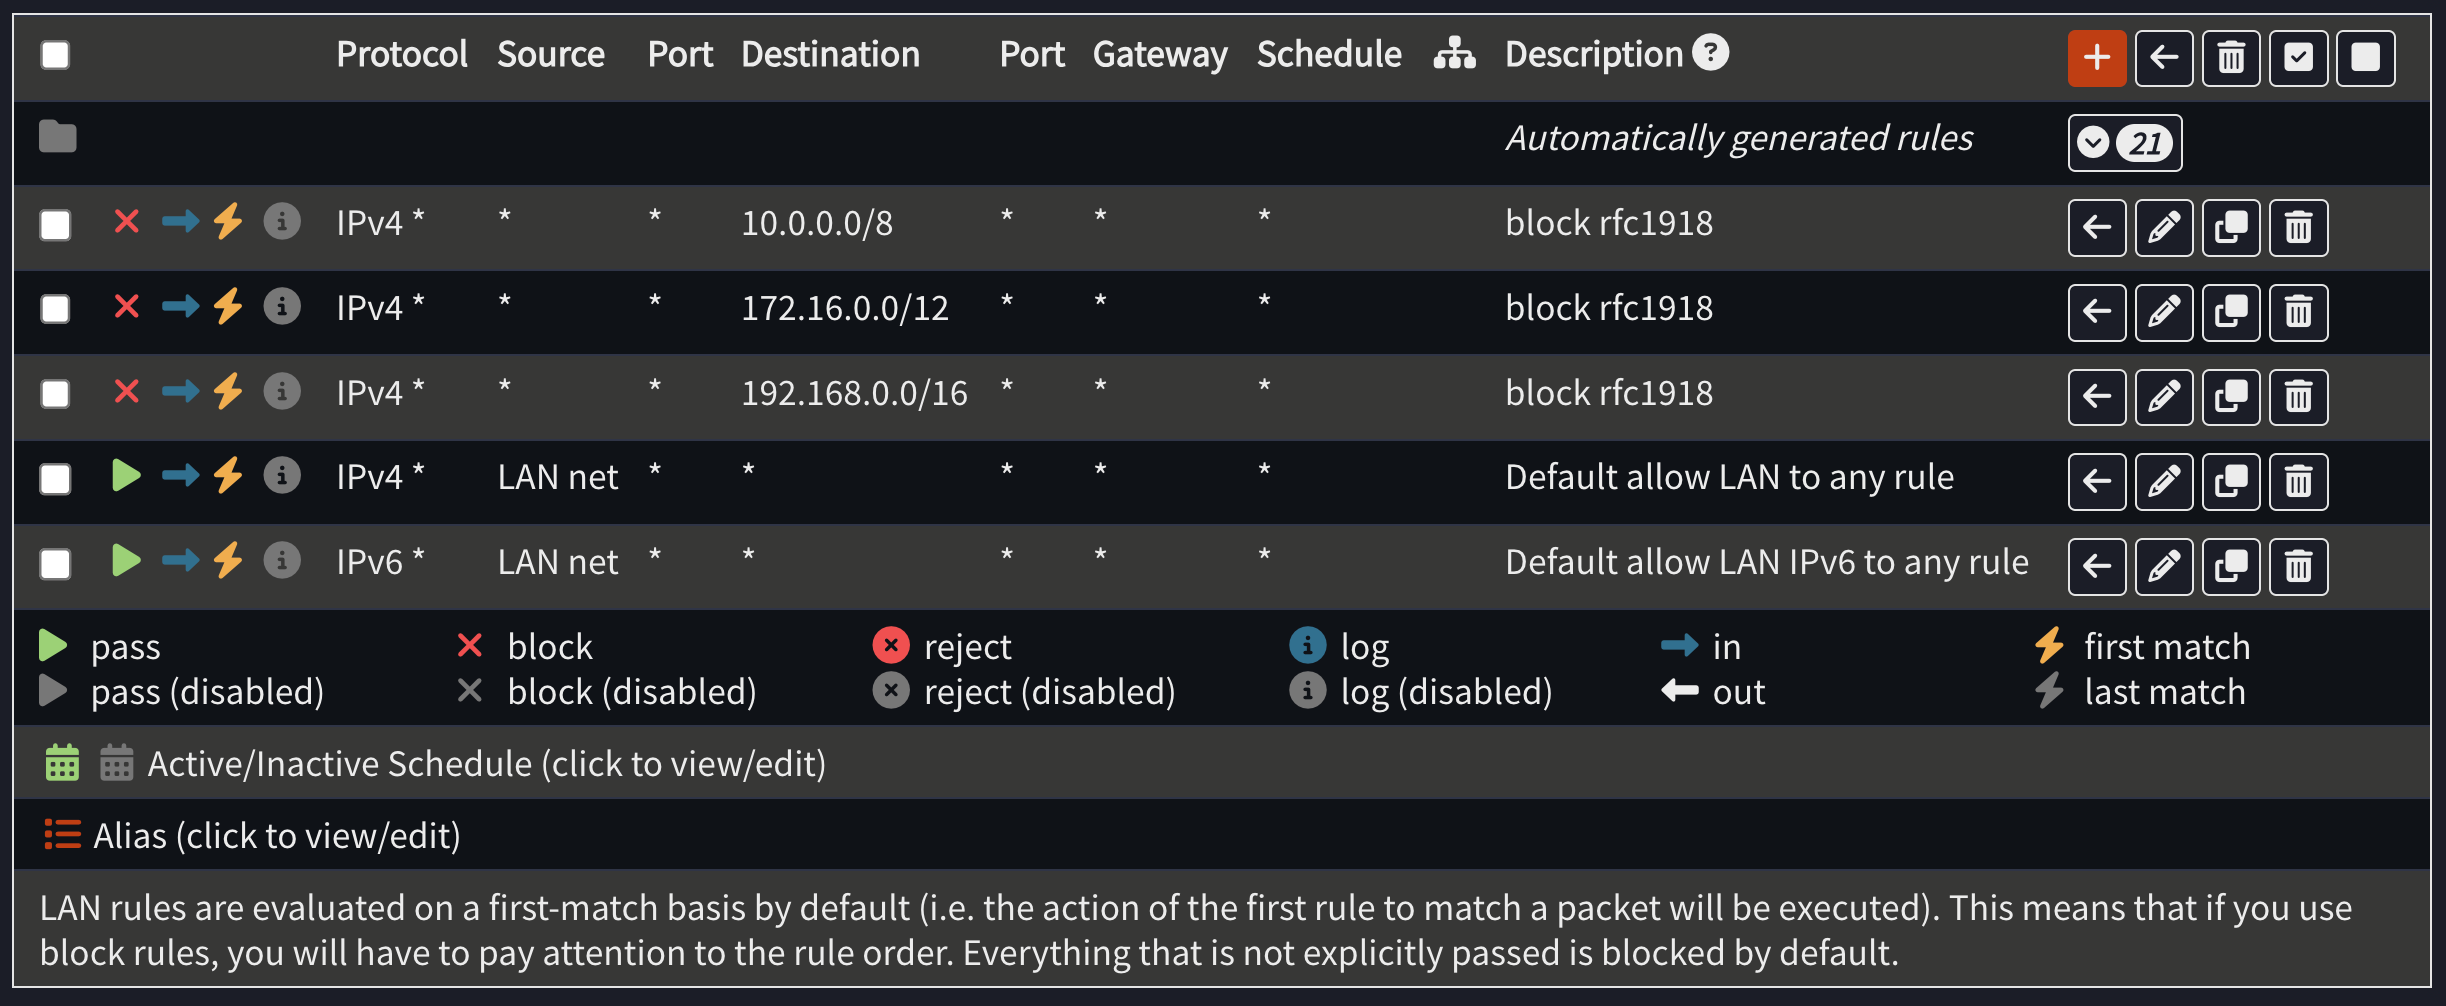
There are three steps we need to take to secure our machines. First, we’ll need to make sure that the LAN is segmented from the rest of the network. Under Firewall > Rules > LAN, you will need to block traffic to the following subnets:
- 10.0.0.0/8
- 192.168.0.0/16
- 172.16.0.0/12
Create a new rule, like this:
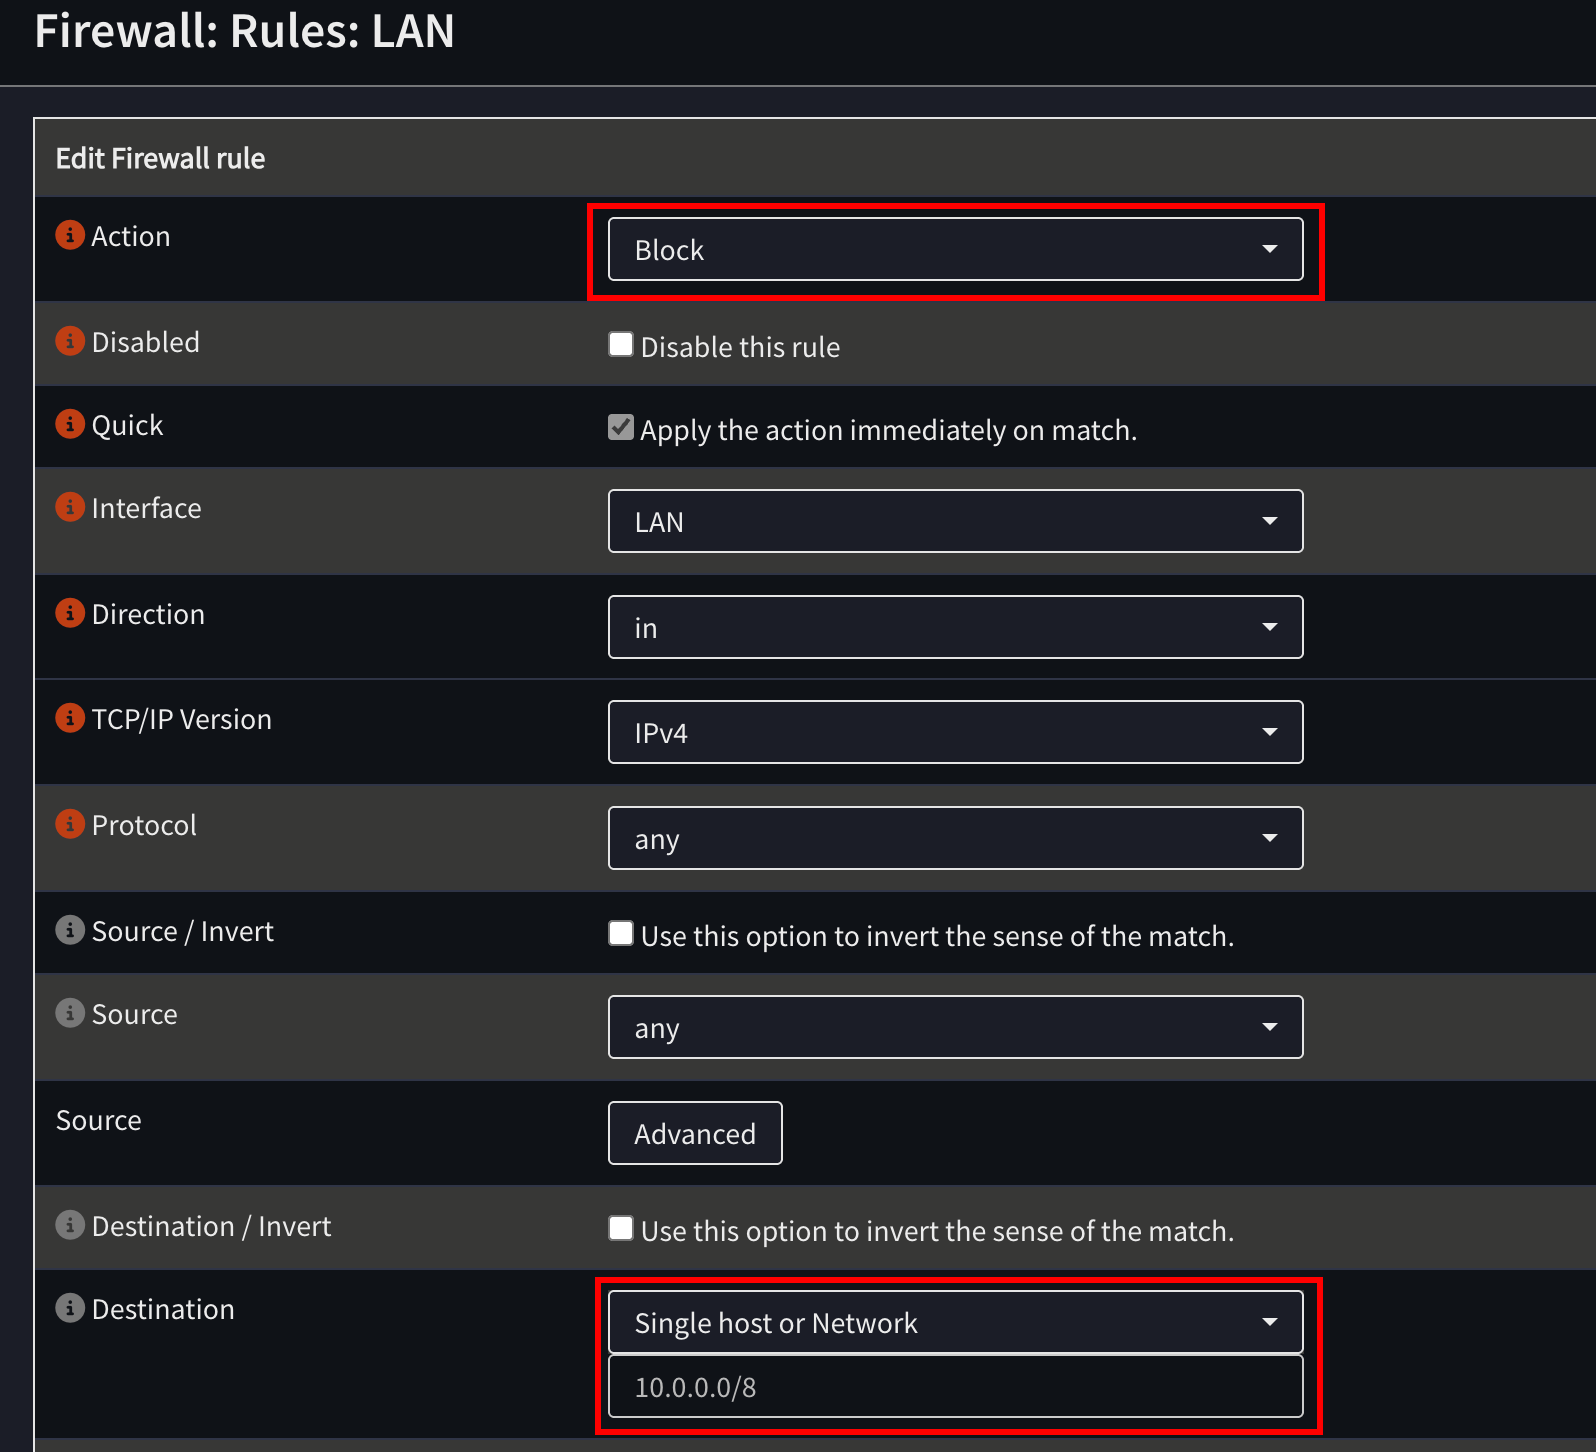
Repeat for 192.168.0.0/16 and 172.16.0.0/12. Your end result should look like this. Make sure these rules are before the “Default allow LAN to any” rules.
Optional: Set up IDS/IPS for malicious traffic detection
We can also set up Suricata on our OPNsense machine to prevent malicious traffic from escaping the network.
To enable IDS/IPS, go to Services > Intrusion Detection > Administration, and go to the “Download” tab. Enable the rulesets that you want, and then click “Download & Update Rules.”
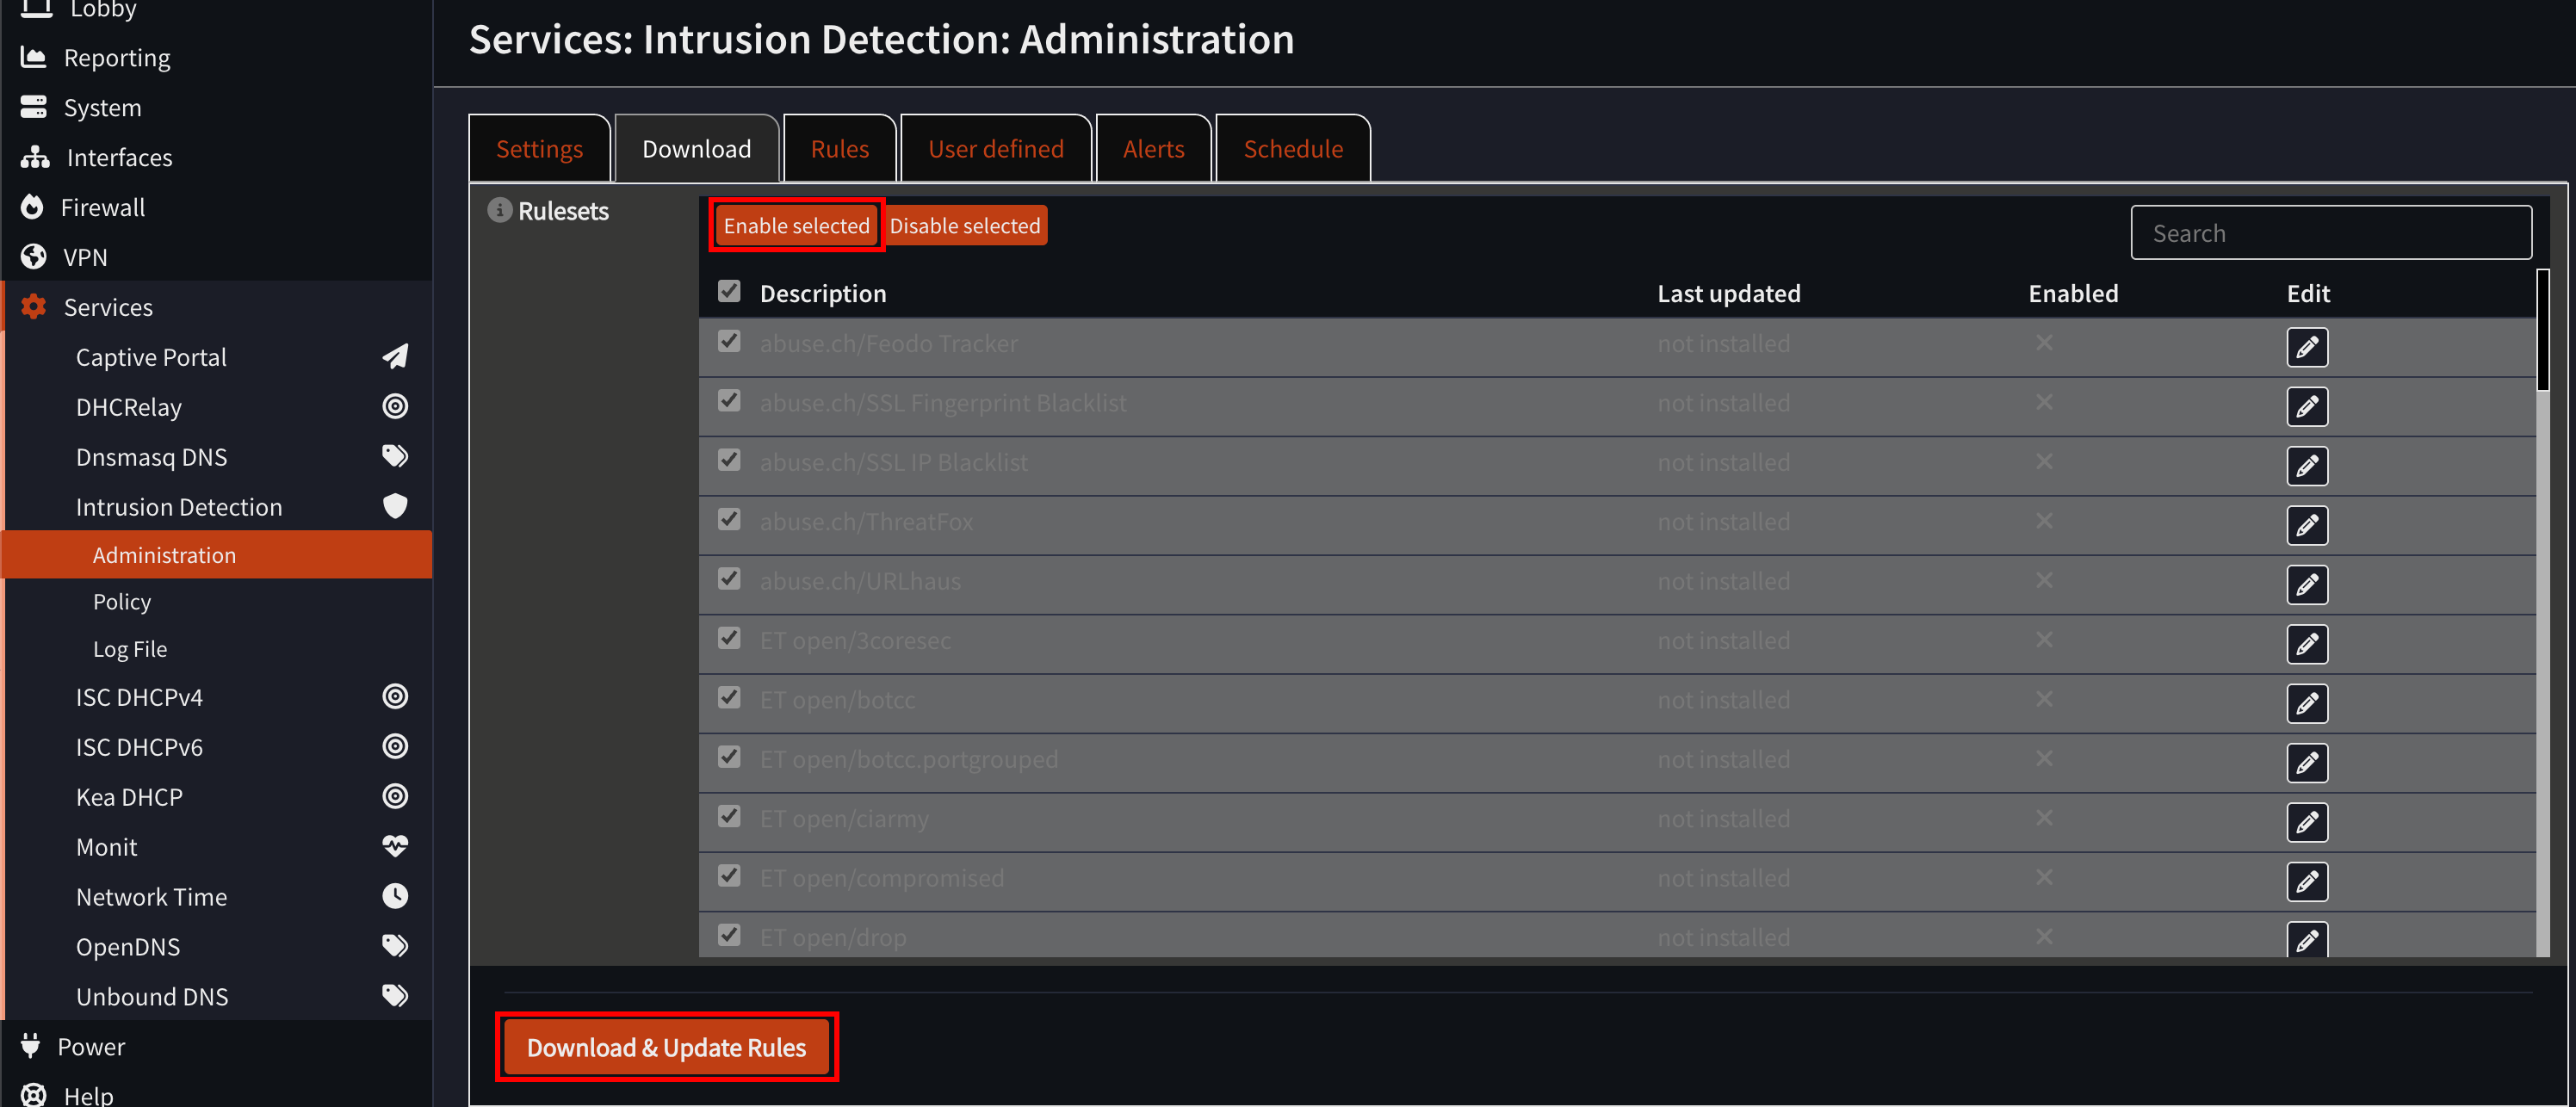
This may take a while. You can now enable the intrustion detection in the settings tab. If you want to block malicious connections outside the network, you can also enable “IPS mode”. However, if your end goal is uninterrupted malware analysis, you may opt to keep this disabled in your setup.
Testing
Let’s create a new VM in Proxmox to test this setup. Create a new VM, and connect it to the LAN port of our OPNsense VM.
Conclusion
Using OPNsense as a virtual firewall provides a cleaner, safer, and more flexible way to isolate malware analysis environments in Proxmox than iptables alone. It reduces the attack surface, simplifies management, and allows for advanced features like IDS/IPS if needed.
Thanks for taking the time to read through this guide!